Important! Please read the announcement at http://myst.dustbird.net/uru-account.htm
Also! Please read the retirement announcement at http://myst.dustbird.net/uru-retirement.htm
Multiple Materials and UV Maps, Single Object
I've got a complex object to texture! Help!
If you've messed around as a noob, built a really neat object, you may of ran into the problem: trying to apply multiple textures to it, only to see ONE texture when you export and link in.
This tutorial will show you how to apply different textures to different areas of ONE object.
This tutorial also assumes that you know how to apply a material, apply a texture, and do UV Mapping basics. If not, please take a look at my Textures 101 tutorial first.
One Object, Multiple Textures
Why would we have one object with more than one texture?
Well, most man made objects look that way. Imagine a chair. It has a black leather seat and back, but a shinny stainless steel frame. That's 2 textures.
Okay, but why not separate the two parts and have two objects, each with it's own texture?
You can do that if you want to. But moving 1 object around is easier than say 2, or 9 or 20......well you get the picture
There is also the question of: Why not have one material and then multiple textures? Use multiple UV Layers!
Sure, you could do that too. Now then, Here are your two textures: Dark rough Brick, and Shinny Glass.
How are you going to apply the Specularity to just the Glass in that case? (Specularity is that shinny bit you get when light shines on a shinny object). If you adjust the Specularity slider, it's going to affect the brick too, not just the Glass.
Answer? Have 2 Materials. One Brick, One Glass, BOTH applied to One Object.
Okay, let's get started.
......Oh, Hey, Andy Finally shut up and now he's teaching.....
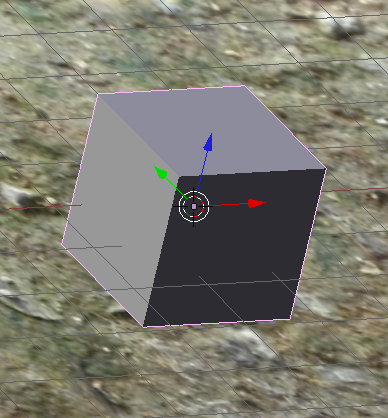
Okay, first we need an object. I've got a cube here. Just a plain, simple cube sitting in my Footstep Test Age.
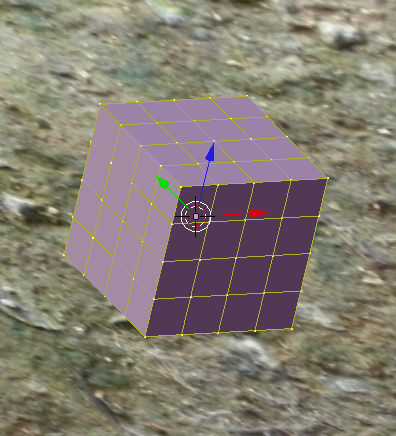
Don't be fooled. This Cube is highly dangerous! It's so complex.....well, okay, all I did was sub-divide it a few times! I imagine one of your objects is more complex, but still we'll use something simple for now:
Okay, now we need to apply our first Material to it. So go to the Materials Panel and create a new one. Name it to something useful if you like:
Make sure you turn ShadowBuf off like my Arrow shows. Next, go to the Textures Panel and load up an image that is a texture. In this case, I'm going to use polished wood:
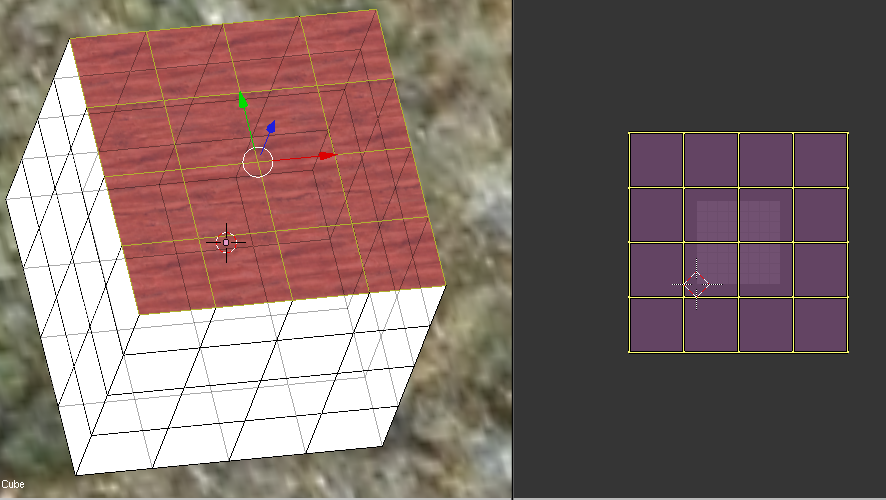
Okay, now go to Edit Mode and select ONLY THE FACES YOU WANT THIS TEXTURE TO APPEAR ON!!
Unwrap these faces and apply your texture in the UV Edit window:
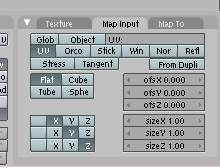
Once you are done with that, go back to Object mode and go back to the Materials Panel. Click on the Map Input tab, and make sure you've clicked on the "UV" button:
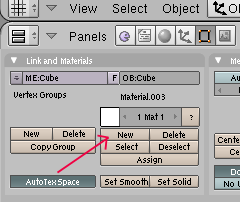
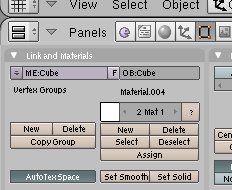
Now go to the Edit Panel. Look down at the Link and Materials Tab:
As you can see, it's showing you how many materials you have. Right now it's one. Well, we need another one, so click on the New button where my arrow points.
Now go back to the Materials Panel. You should have a 2nd material now, and you can click on those arrows to switch back and forth from Materials 1 or 2. I've seen objects with up to 14 Materials on them! Whew!. Okay, make sure you are on the 2nd material.
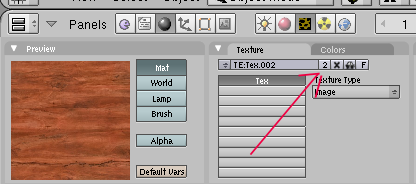
I'm sure you've noticed that it's copied our first Material. We need to fix that, but before you do, click on the Textures Panel. If you look where my arrow is pointing, you'll see a number "2"
Click on that 2, CAREFULLY AND DON'T CLICK ON THAT X!!
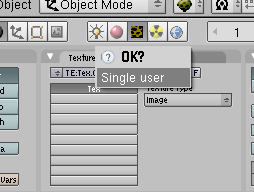
A box will pop up asking if you want to make this Texture a single user. Tell it yes.
Okay, now go back to the Materials Panel. Now click on that X here, and delete this material.
Say what?
I know, you're asking yourself that question. Trust me, all you're doing here is removing the info for the 2nd Material, not actually removing the material itself. Please do this, and then click on the New button to create a "New" material for our 2nd Material.
Now that you've done that, go to the Textures tab and open up a new Texture, in my case, I wanted a metal band around the wood, so I've picked a neat rusty metal texture:
Okay, now go back to the Edit Panel, and also go to Edit Mode.
First thing you need to do: Unselect all the faces!!! Second thing you need to do, in the Edit Panel, make sure you are ON the 2nd material. In my pic below, it shows I'm on the 1st one. Click on the arrows until you are on the 2nd on. It'll say "2 mat 2"
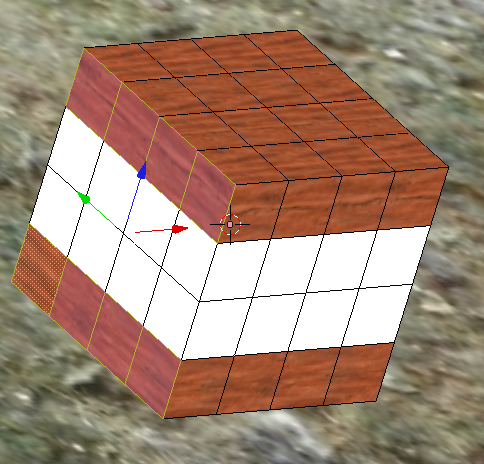
Now select the faces that you want to apply the 2nd texture to. In my case below, its where you see the white on the cube:
Now go back to the Edit Panel. Where it shows the Material we are on is a button that says "Assign" Click on it!
Now unwrap the faces, and over in the UV Edit window, apply the 2nd texture. Adjust and scale it how you want.
Okay, now go back to the Materials Panel, to the Map Input tab and make sure you hit the UV button here too:
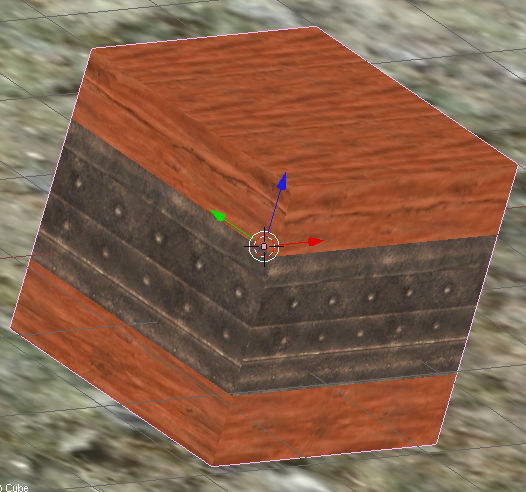
Okay, now your 3D window should show this now:
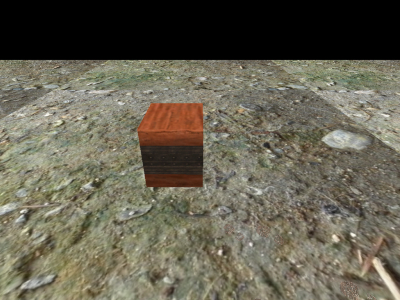
Okay, that's it! Congrats! Now you can export, link in and look at your object:
Why is doing it this way so important?
Well, beyond what I stated above, about having only one object to deal with. You now can adjust each material. I can make the polished wood REALLY shinny if I want, but it won't affect that metal band. Also, you can change the colors of each material to help you in your shadows and lighting. The lists go on.
Return To: Andy's Blender Tutorials.
