Important! Please read the announcement at http://myst.dustbird.net/uru-account.htm
Also! Please read the retirement announcement at http://myst.dustbird.net/uru-retirement.htm
Using Sensor Regions
Sensor Regions can be used to make things happen, simply because the Avatar is in them, or because we entered them, or because we exited them.
A good example of using a region to have something happen is all around in Uru: Your footsteps are heard because you're in a footstep region. Sound Effects, Random Sounds and Music all happen because you are in or have entered a region. You have things you can click on, but can't until you're close to them, because you have to be in the region near the clickable object. Animations can happen because you entered and/or exited a region.
This tutorial is going to show you how to use regions to make a animation happen. You need to be familiar with how to put object animations in Max. If you do not know how to do this, I recommend watching TheMagician's Video Tutorial On Animation to learn this.
You also need to know how to put in Sound Emitters. Here is my Basic Sound Tutorial for that.
This tutorial also assumes that you know how to setup Max for making an Age, making basic objects, texturing them and some lighting.
This tutorial also assumes that you know you have to attach the PageInfo to all objects in your Age, and that you must attach each component to your object.
Responder Region: Making A Door Open/Close When Near
We all use these doors when we go out and about in the Real World. When we go in and out of Walmart, a grocery store, all sorts of places. As we get close to the door, a sensor just above it detects your presence and opens the door for you. The door closes when it no longer senses you and it's timer has counted down.
We're going to make something just like that. Only what will make the door open AND close is your avatar entering and exiting a region.
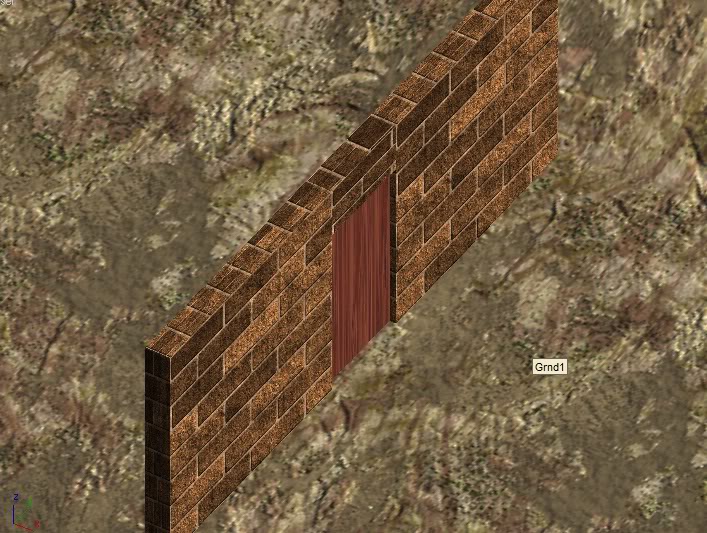
First you need to build some Objects. I have a wall and a door in my scene here. I've also animated the door so it takes about 1.5 seconds to open or close:
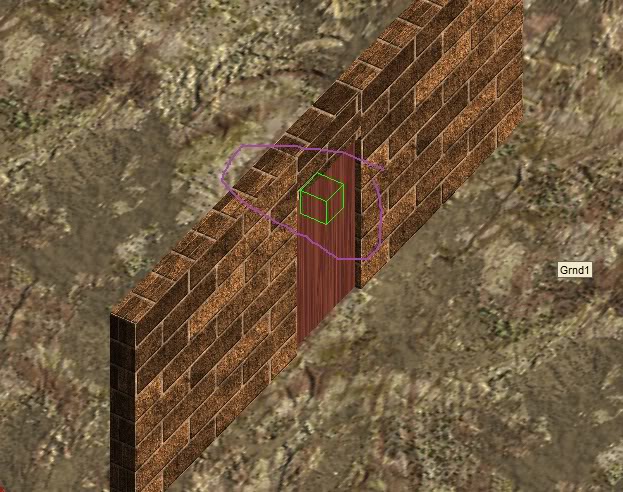
Next, I've added a sound emitter for the door, as I want to hear a sound effect of the door opening and closing:
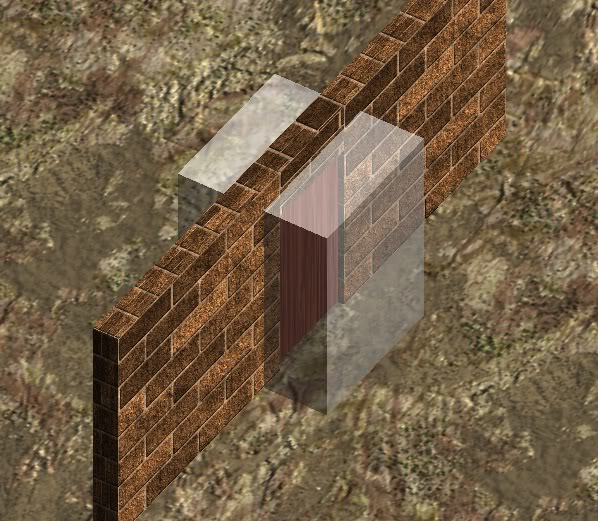
And last, I've made a box that is going to be my Responder Region, it will detect when I get close to the Door and when I walk away from the door:
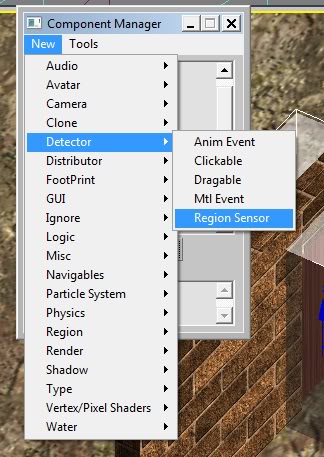
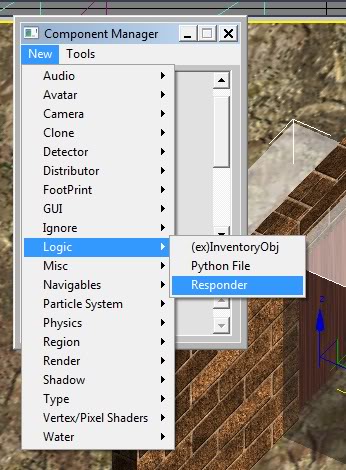
With the Region you made selected, let's make it a region by attaching that component from the Component Manager:
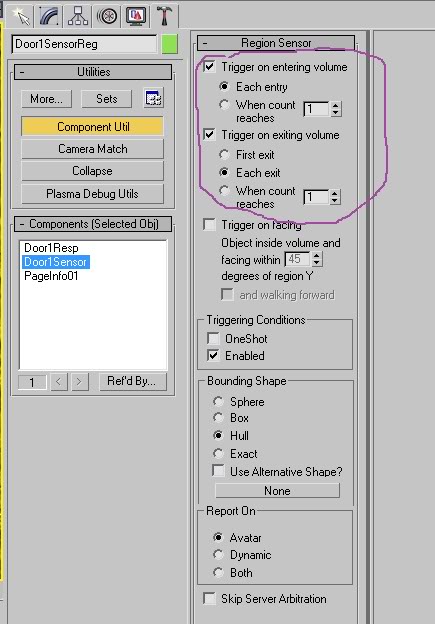
Over in the Component Utils, set up your Region like this:
Where my purple circle is, we are telling the Region that we want it to be a trigger whenever the avatar enters the region, and also whenever the avatar exits the region.
Now we are going to attach a Responder to the region. This is going to be how we tell the game engine what we want to happen when we trigger the region:
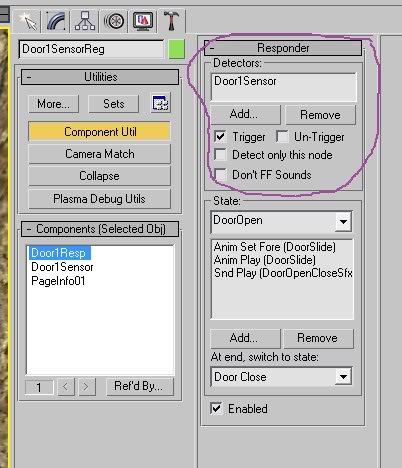
Select the Responder you attached over in your Component Utils.
First, where I have my purple circle, we need to tell the responder that the trigger for it is the sensor region we made. Do this by clicking on the Add button, and selecting our sensor region we made for the door.
Now we need to tell the responder what it is it's going to do:
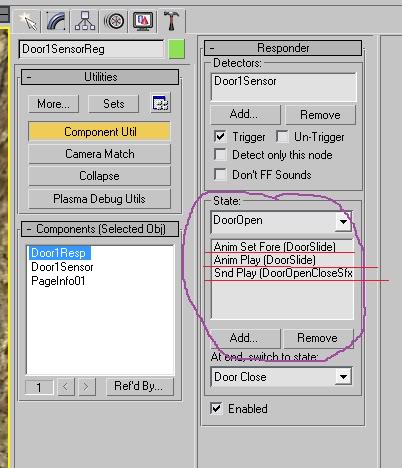
Where I have my purple circle is where we're going to do some work. The Responder has States, and each State has Actions. It's the Actions that get performed by the game engine. Each State can have many Actions, and each Responder can have several States. The default name for the first State will be "State 1". Rename this to something more useful. As you can see, I've renamed mine to "DoorOpen" as this is what the first state is going to do: Open the door.
Click on the Add button so we can add our first Action. A box will pop up with a list of Actions. Click on Animation > Set Forward (we do this because we want to make the animation of the door opening to play backwards later, which will close the door). You'll have "Anim Set Fore (none) show up in your box. You'll also have 2 buttons show up at the bottom. Use those buttons to select your Animation you made for your door.
Next, click on the Add button to add another Action. This time click on Animation > Play. Again, you'll have 2 buttons at the bottom show up, and again, you need to pick your Door Animation you made.
Last, click on the Add button to add your last action for this state. This time click on Sound > Play. Again, you'll have 2 buttons at the bottum show up and this time you pick your sound emitter and it's sound that you put in for the door.
You've now finished the First State. When the Avatar enters the region, this state will get performed first: The Door will animate open and you will hear the sound effect for it.
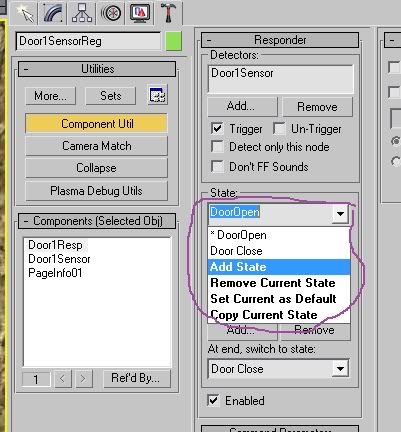
Now we want to make the door close when we walk away from it, so go to the drop down box where you have the name of your State. Click on it and then click on "Add State":
This will make your 2nd state. Rename this one to something more useful. I called mine DoorClose.
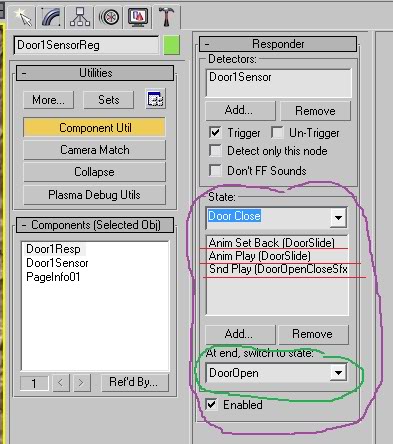
You will be setting this state up just like you did your first state, EXCEPT the first Action, you need to click on Animation > Set Backwards. This will make sure the next time the animation is played, it will play it backwards (closing the door).
So now your 2nd State should look like this:
Note where I have the first action underlined. It says "Anim Set Back" meaning it's set to play backwards.
Now we need to tell each state what to do when it's done with all the actions that were assigned to it. In my picture above, notice where I have my green circle. I have the drop down box set to DoorOpen. This means that when the Door Close state is done, the responder will go back to that state. That means after I exit the region and the door closes, it will be set up to open again if I enter the region again.
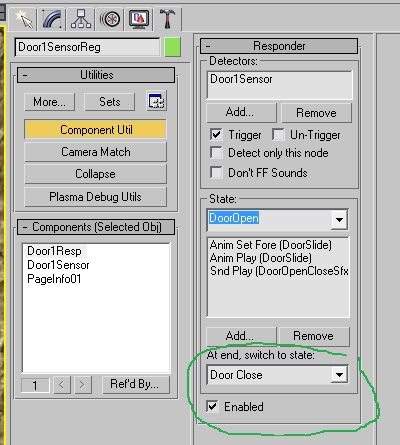
We need to tell our first state this too. So go up and click on the State drop down box and go back to your first state you set, and tell it to go to Door Close when it's finished:
This will make sure that after we've entered the region and the door is opened, the responder is ready to perform the Door Close state for when we leave.
That's it! Your door should now open when you walk towards it, and should close when you walk away from it. Here is a video of just that:
Region Responder: Different Triggers
Okay, now let's make a variation on this. A good example of what we are about to do is the Classroom Door in any Hood. When you walk up to it, it doesn't open. Instead, you have to click on the door button to open it. BUT, after it opens, when you walk through the door and away from it....it closes automatically!
Repeat the above steps, however, here are some things you will need to change or do instead.
First, you're going to have to make a clickable for the avatar to click on to open the door. You can make a button, put it on the wall, or the door itself, etc. You can make a one shot avatar animation of the avatar touching the button if you want. What I did was just make the door itself a clickable and left out the avatar animation for now. Keep this in mind however, if you use something that you've already made and exported a clickable, if you gave that object physics (made it a collider), you will have to remove that component from the object. The Clickable component will give the object physics. If you don't, you'll get an error when you go to export
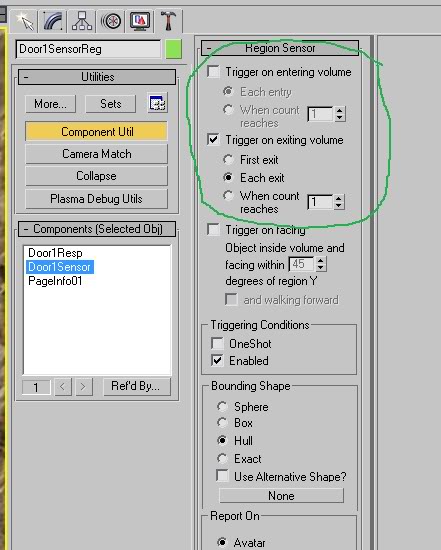
Once you have made your clickable object and gave it a clickable component, select your region. Go to the component utils tab. Make it look like this:
What is different here than what we did in the first part of the tutorial is, we've removed the Enter Trigger. We don't want our door responder to be triggered because we simply entered the region this time. But we DO want it to trigger when we EXIT the region.
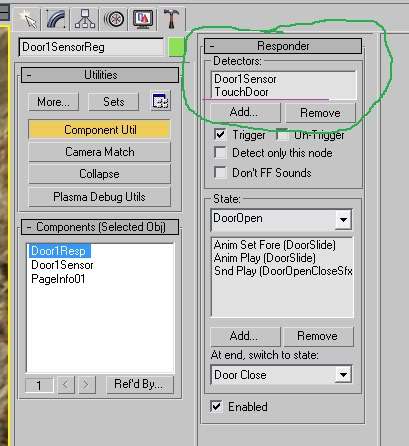
Now select the responder in the Component Utils. We need to add a detector to it. Right now it only has the region as a detector, we need to tell the responder to start when we click on our clickable object:
click on the "Add" button under Detectors, and add your clickable to here.
Okay, that's it! You don't need to change the States as they will be doing the same thing as we want them to from the first part of this tutorial. Export, link out and give it a try.
Here's another Video of how it looks (no, I don't have any cameras put in for better shots. )
Return To: Andy's Max Tutorials
