Important! Please read the announcement at http://myst.dustbird.net/uru-account.htm
Also! Please read the retirement announcement at http://myst.dustbird.net/uru-retirement.htm
Sprites and Billboards
Okay, so you've got some light's that you want to have a glare or diffused glow look to them. Or you have a light beam from a directed light.....or trees off in the distance, that are actually flat planes that the player never gets to, but always need to face the player.
We see the light glows and flares all around Uru.....in just about every Age where there are lights. These are called Sprites.
We also have light beams, like the ones in the Hoods around the fountain. They always face the player. Just like the trees you see off in the distance outside in Gahreesen. These are actually called "Billboards" but the GoW Plugin will still call them sprites.
I'm going to teach you how to make these.
This tutorial assumes that you know how to make objects in Blender, move, rotate and size them. Also we'rer going to assume that you know how to texture and UV map them.
Getting Started: Lamp Glows or Flares known as Sprites
Sprites are different from Billboards in that a Sprite will always face the camera, pivoting on it's center in every direction like a sphere. Billboards on the other hand will always face the camera, but will swivel around on the object's local "Y" axis.
For a glow or glare around a light, you'll want to use a Sprite.
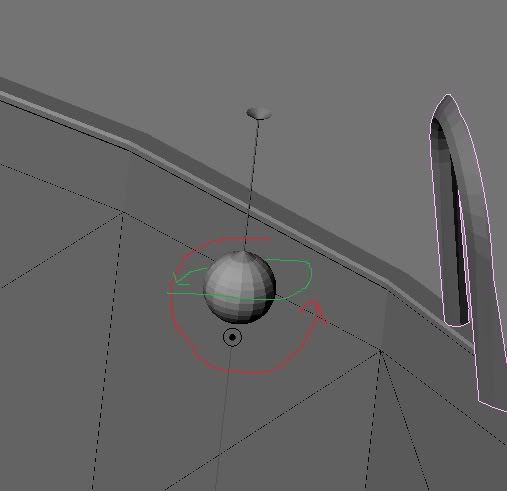
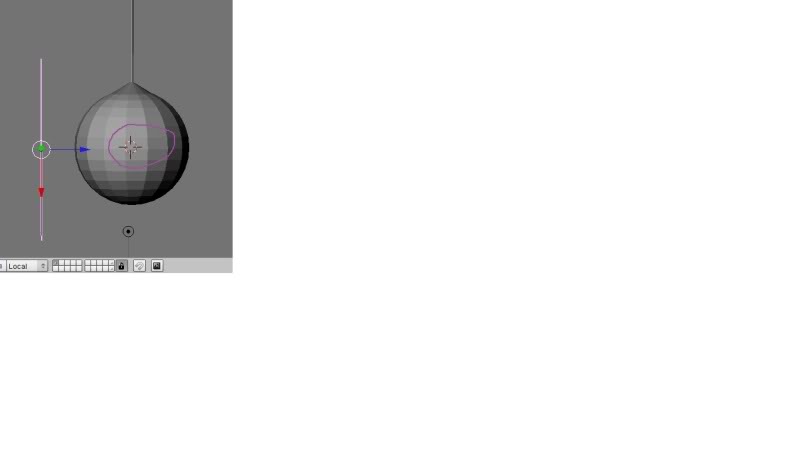
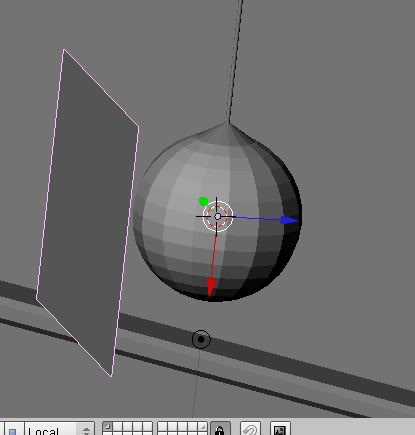
Here's a picture of a hanging lamp I've made. The sphere you see is the actual physical lamp that will be rendered in game. The green and red arrows I've drawn is where I need my sprite to swivel around:
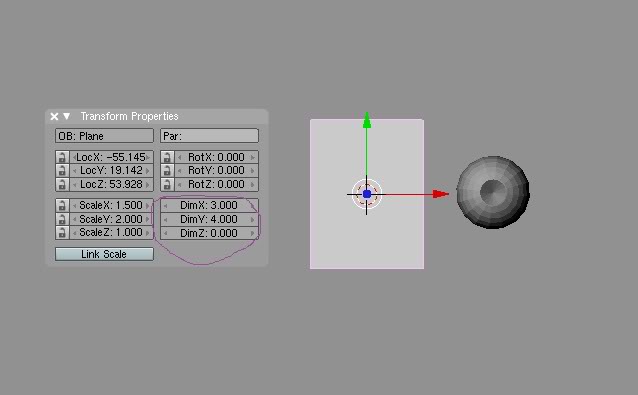
To make a sprite, you need to make a Plane object, and make it's size right. I have a 1 foot (blender unit) wide sphere here, so I've made my plane 3 feet high by 4 feet long:
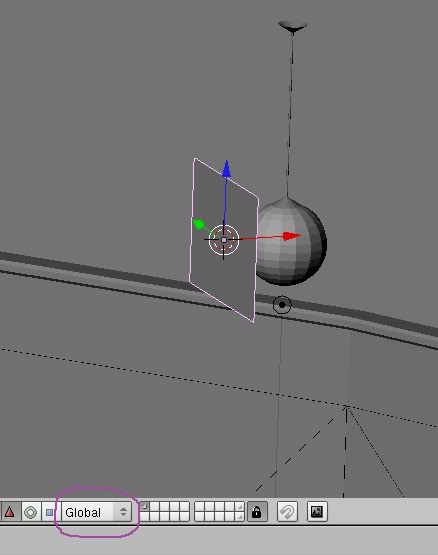
Now we need to physically move the plane where we want it to sit as it swivels. Make sure you move and rotate the plane for now while in "Global" view! Make sure that the face of the plane is facing outwards like in my picture.
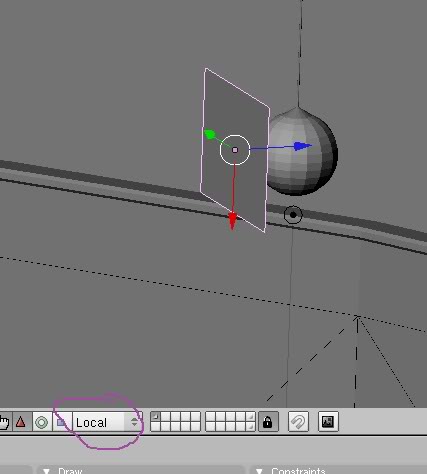
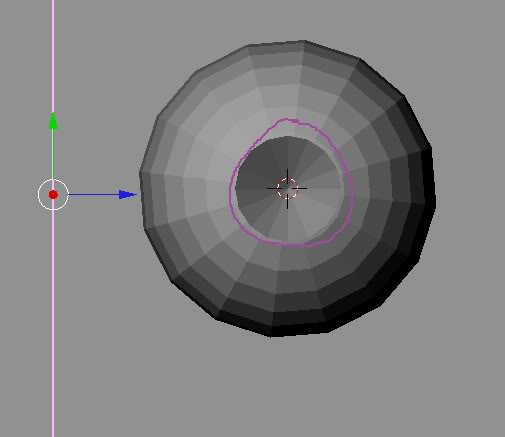
Now go down and change the view from "Global" to "Local". We don't care where the "X" and "Y" axis are, but we do need to make sure that the "Z" axis is facing away from the face of the plane that will always be towards the camera:
Okay, now we need to move the Plane's center. If we leave it where it's at, the plane will swivel around all right....but not around our light globe. It will instead swivel around it's very center of itself, and will look wrong in Uru.
To move the center of the plane, place your 3D Cursor where we need it: the center of the light globe:
As you can see from my 2 pictures above, I've placed the 3D cursor in the very center of the globe.
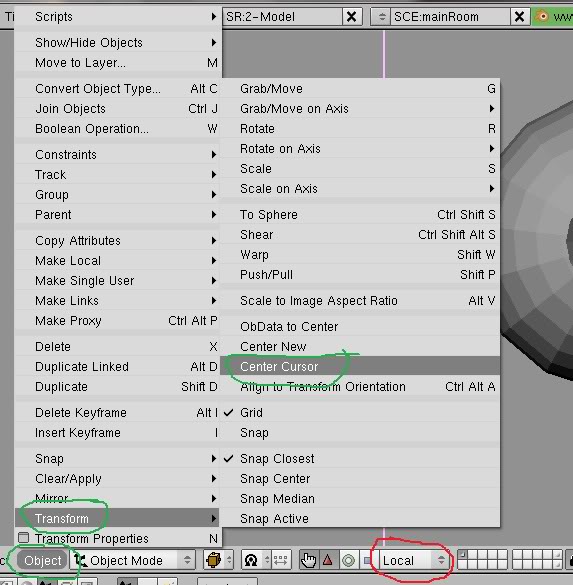
Now go down and click on Object> Transform> Center Cursor
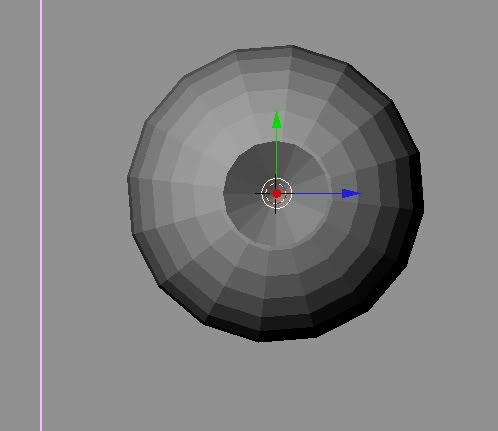
As you can see from my 2 pictures below, the Plane's center point is now located in the middle of the light globe:
Okay, now we can put in the game logic that will make our plane a Sprite. There are 2 ways to do this. The first way is by using the Logic Panel.
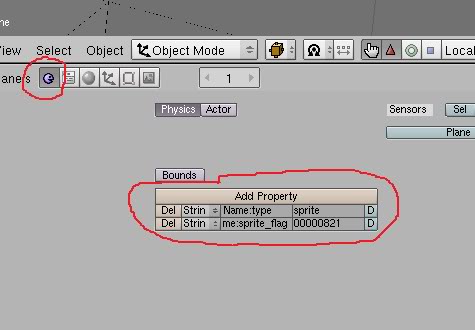
Go down and click on the Purple Smiley face. This calls up the Logic Panel. Click on the "Add Properties" button twice. You'll have to "Float" properties pop up. Change both of them to "String".
In the first one, change "Name:" to "type" so that it looks like my picture above. In the box to the right of it, type "sprite". In the second property, change "Name:" to "sprite_flags" so that it looks like my pic. In the box to the right, type 00000821 Yes, you must put FIVE zeros in front of the 821.
00000821 tells the plugin when you go to export your Age, that the panel is a sprite that swivels around it's center point, with the Z axis always facing away from the player, and that it is not bound to any other axis.
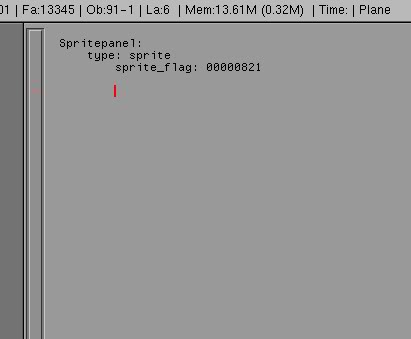
The 2nd way you can do it is with the ALCScripting:
That's it for your light sprite! Give it a good glow or glare texture and enjoy!
Billboards
If you have an outside scene, where far away you have trees that need to always face the player, or if you have things such as light beams that must always face the player, then Billboards is what you use.
Please note: the GoW Plugin will refer to them as "Sprites" still, but they are actually "Billboards"
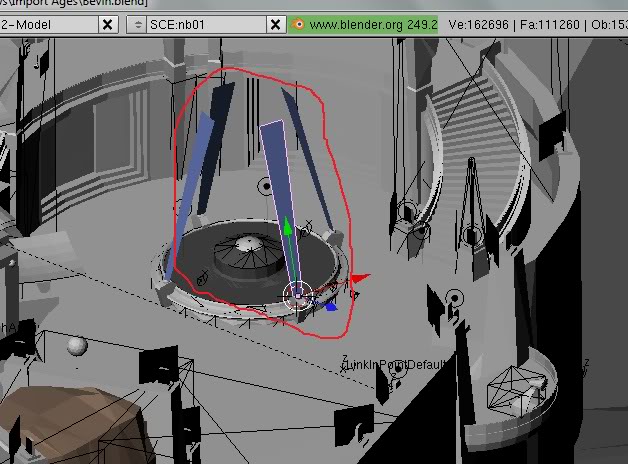
Let's take a look at a good example of where this is used: Bevin.
You no doubt recognize the above scene as the fountain area in Bevin. The 4 blue panels that I have circled are the light beams we see in the game.
You can make the same thing, just make sure that you do all your editing in "Global" view!!!
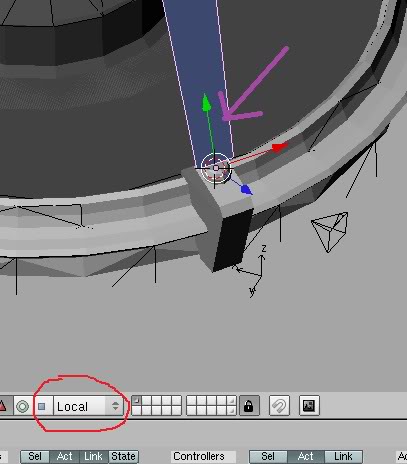
Once you have the plane that is going to be your light beam (or tree) where you want it, switch to "Local" view.
You want the planes pivot point to have the "Z" axis facing away from the camera (in the pic above, Cyan has the planes flipped around. Trust me, the actual textured face is on the other side of this plane). The important thing here is the "Y" axis. Notice how it is pointing along and up the face of our light beam panel here.
That is because this panel will turn along the "Y" axis, keeping the "Z" axis facing away from you. We want the panel to be bound to it's "Y" axis, else it would swivel all over the place and not look right.
Now for the Game Logic. Do the same as I mention for Sprites above, only this time, under "sprite_flags" make the number:
00000823
The "3" will make our panel a "Billboard"
That's it, make sure you texture it with a good light beam, or tree!
Return To: Andy's Blender Tutorials
