Important! Please read the announcement at http://myst.dustbird.net/uru-account.htm
Also! Please read the retirement announcement at http://myst.dustbird.net/uru-retirement.htm
Particle Flocks (Eder Kemo Bugs)
Particle Flocking is what we see when we watch the Glow Bugs that are in Eder Kemo. You can also see them in Myst V in the Age of Direbo.
How you make this is actually not that hard. Figuring out the parameters for the flocks, was....very hard that is. However, I'll be giving you the numbers that Cyan used exactly. You can either use them, or play around with them, but they'll get you in the ball park.
This tutorial will show you how to have the same kind of flock in your Age. They will not attach themselves to your Avatar, as you have to do something very special for that.
This tutorial assumes you know how to make things in Max, how to set up Cyan's Plugin, how to assign Plasma Components, and that you've read and understand how to set up Particles and Object Animations. If you do not know how to do these things, please go back and read those tutorials.
Something Bugging You?
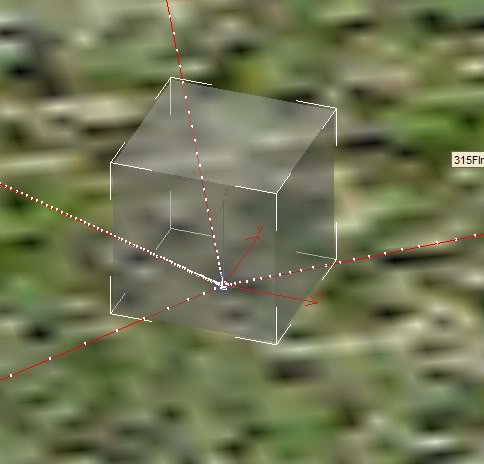
Okay, to get started you are going to need a mesh that is your Particle Emitter. A simple Cube will do. I've got one here in my Shell for Pahts. It's see through because I also have a Run Time Light with them (you don't need that, I was playing with it):
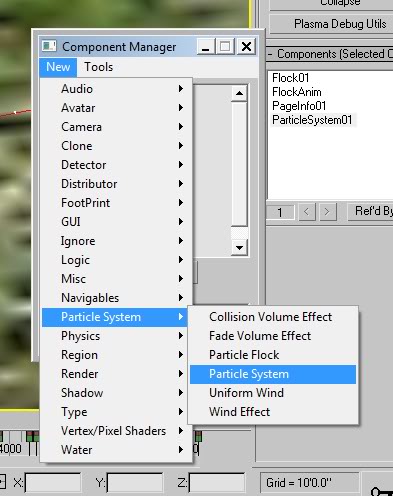
Once you have your mesh made, open up the Component Manager and assign a Particle System component to it by clicking New>Particle System>Particle System:
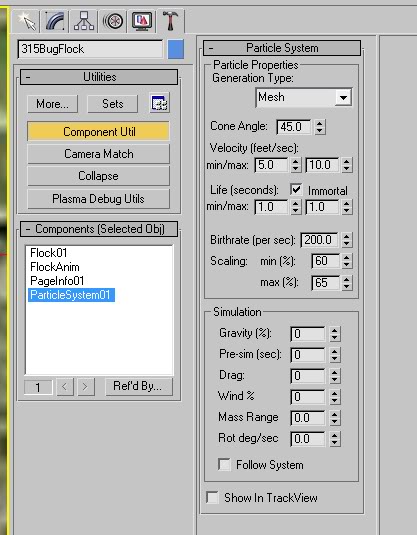
Then go over to your Component Utils Tab and select it:
Set your particles up as you see in the above picture. These are the EXACT values that Cyan used for their bugs.
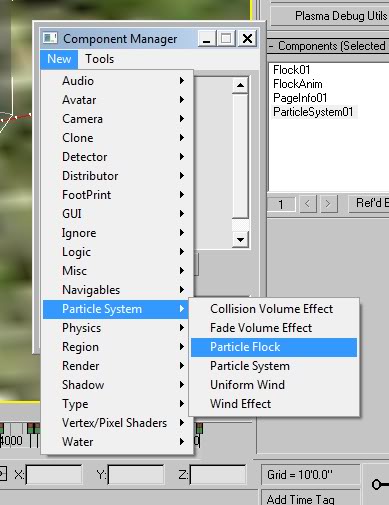
Next, we need to assign the Particle Flock component to our Mesh by clicking on New>Particle System>Particle Flock:
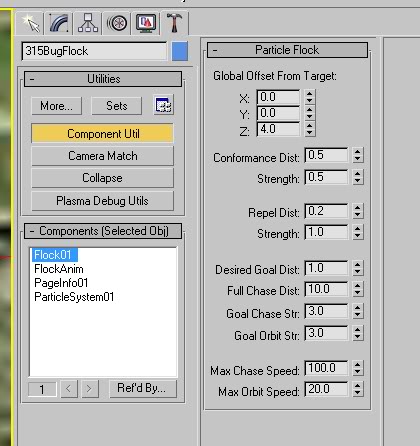
Again, go over to your Component Utils and select the Flock you just assigned to the mesh. Set up your numbers just like mine in the pic below:
Again, these are the numbers that Cyan used for their flock (well, if you open up the prp file in a program like PrpShop, you'll see different numbers.......that's because the numbers in the prp file are actually the Square of the numbers you enter here in Max.....now you know why it was hard at first to figure out what the numbers were suppose to be, heh).
Again, you can play with these numbers, but what I have listed above is what Cyan used.
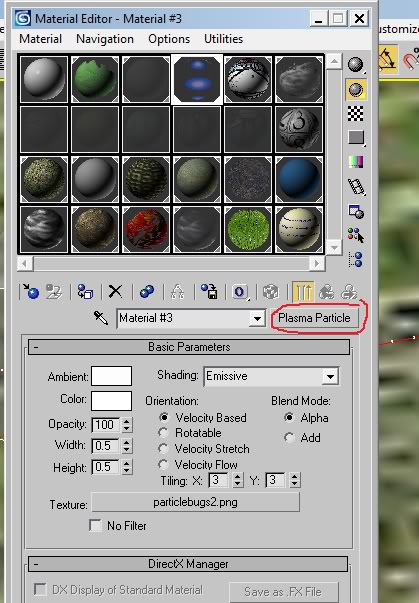
Now we need to texture our particles. Open up the Material Editor and get a new material. Make it a Plasma Particle type. Assign it the same numbers that you see in the pic below:
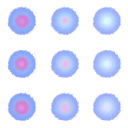
Now for the texture, I used this that I made:
I used Cyan's texture as a template. I used Gimp Shop to create the same sized transparent texture, and then used the air brush, color adjustments, and the Opaque setting to get it to look like this.
Now if we were to export right now and link in, we'd see the bugs, move all around a center point.......but they'll sit right in one place. If you want them to move and meander around like in Kemo, you'll have to animate the particle Mesh.
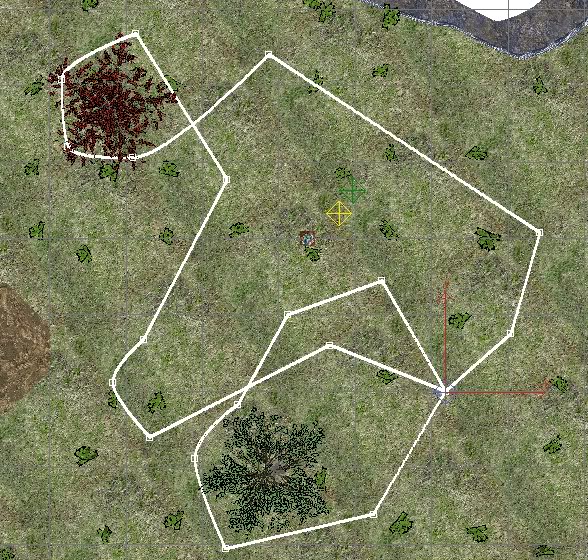
Now, you are going to want this to be a LONG animation. Mine is 5,600 frames long. That way the path of the bugs does not seem very repetative, and also are moving slowly around. Here is the path that I gave mine:
And here is the key settings in the time track:
The important thing to remember, is to have your emitter back where it started at the beginning. This is because you are going to loop the animation, and you don't want the bugs to suddenly disappear and reappear elsewhere (unless you have the go away for a while like they do in Kemo during the rain storm).
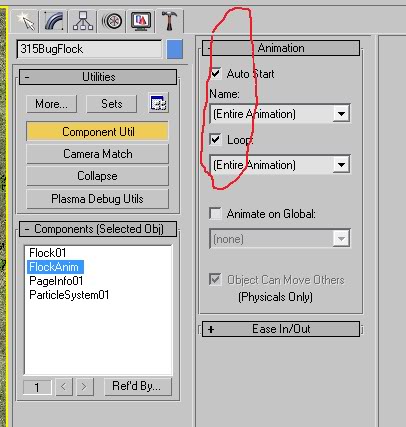
So don't forget to Autostart and Loop your animation:
That's really it, except to keep in mind that if you have the emitter move close to the ground, walls, or other structures, the particles will appear to be going right through them. So you'll need to use particle blockers in the case of this, or just be very careful where you have the emitter go to.
Here's a 45 second video of my bugs in my Pahts Shell:
Return To: Andy's Max Tutorials
