Important! Please read the announcement at http://myst.dustbird.net/uru-account.htm
Also! Please read the retirement announcement at http://myst.dustbird.net/uru-retirement.htm
Object Animation
Link in to Eder Kemo.......when you get close to the Journey Door, you notice those funky flat top trees (well, not too funky, I lived over in Italy in Naples and they have pine trees that look like that).
Notice how they sway? With nice creaking sounds noless! Move on down the path and you start to see all sorts of other animations: other strange plants that sway or swing....and floating and rotating statue! Even the fish in the pond!
Go to the Watcher's Pub, or any of the Guild Pubs.....look at the lights. Notice how they are swaying gently.
These are excellent examples of Simple Object Animations (except the fish......those require something different, and not covered here).
Over at the GoW Wiki, they explain the scripting to you for this, and on here we have a ALCScripting library that lists it too.
However, none of that scripting is going to do you one lick of good without knowing WHAT you have to do in Blender.
So you can either dig through all the Blender tutorials, or just keep reading on...I already did the digging for you:
"You Got To Move It, Move It!"
Most of the animations that I listed above have two things in common:
1) They start the moment you link in.
2) They are looping and never stop.
That's what I'm going to show you here. The good news is that you can expand upon this and make more complex animations such as Triggered ones (opening and closing doors, towers rising and dropping because the Avatar did something, etc).
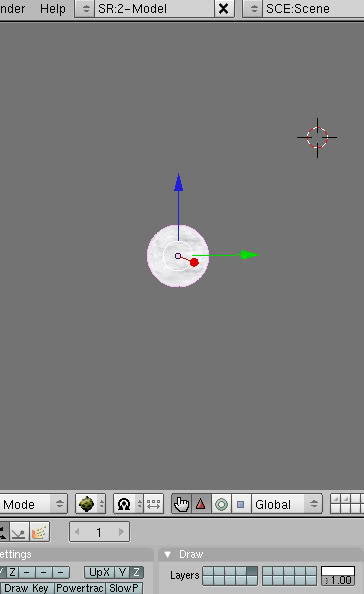
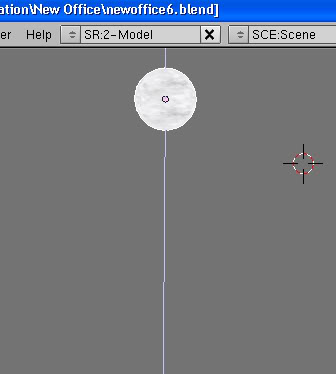
Okay, let's do something REALLY simple: A globe that bounced up and down. Here's a light globe from my Age Neolbah.
What we will be doing is we will be setting a "IPO" curve for this object. Don't worry, sounds hard, but it's actually very easy.
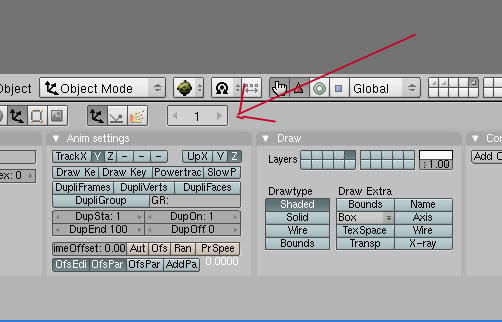
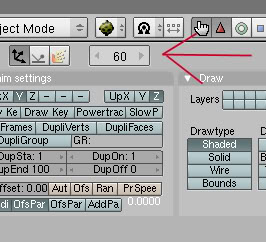
First, look down in your Buttons Menu and look at the frame box (my arrow is pointing at it), make sure it's set to "1"
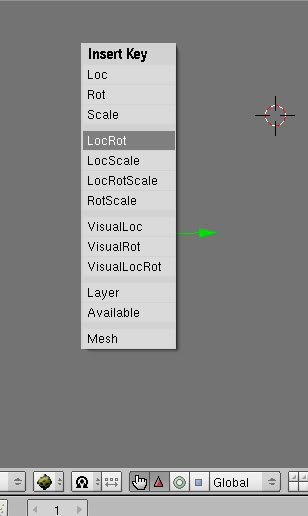
Now make sure your object is where you want it to be at the start of the animation. As I'm making the sphere bounce, I have it on the floor (the floor is else where at the moment, heh). Once you have done that, move your mouse cursor to the 3D window and hit the "I" key. You'll have this menu pop up:
What we are doing is setting a "Key" for frame number 1. Depending on the kind of animation you are doing will depend on what you select here. A ball bouncing up and down would be animating it's location only. However, I've found it's a good habit to select Location AND Rotation when you get into more complex animations. So go ahead and click on "LocRot"
Congrats, you just made your first Key. Now go down to the frame box, we have to go to what will be the next frame.
Before we continue, let's make sure we understand about "Frame Rates". A "Frame Rate" is how many frames are played per second usually. You may have heard of this playing other games, where someone may ask: "So how was your FPS?". What they are asking is how many "Frames Per Second" were being rendered while playing a game. In this case, a high number FPS is good, and means the game is playing smoothly. A low FPS is bad, and means the game is laggy or jerky. "Frame Rate" is like this, but is actually talking about how many frames per second are being played in a animation or movie. Blender's Frame Rate is default to 30 FPS or 30 Frames Per Second. This means when you make an animation in Blender, when it's played back, it will be based upon that Frame Rate. If we have our object move from point A to point B, in "X" amount of frames, we are telling Blender how fast to move something. How fast it moves will depend upon:
1) The distance between point A and B 2) What frame we are at when the object reaches point B
With the Frame rate set to 30 FPS, and if the distance between point A and B is 6 feet will be our constants. If we set frame 1 at point A, and then set the frame to 30 and move the ball to point B, it means the ball will move that 6 feet in 1 second. If instead, we set frame 1 at point A, and then set the frame to 90, then move the ball there, it will take the ball 3 seconds to move that 6 feet.
That's Frame Rate and FPS in a nutshell.
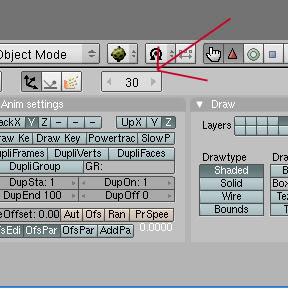
Here is your frame box:
Set the frame to 30 like my arrow points to.
Now move the ball up 6 blender units on the Z axis. You can do this by hitting the "G" key, then the "Z" key, and then get the number "6" then Enter:
Now with your cursor in the 3D window, hit the "I" key again:
Once again, hit the "LocRot" selection.
Now you've just set a key at frame 30.
It also means that Blender understands you want the ball to start out at frame 1 where you had it, and then take 1 second to move it up 6 feet (1 blender unit = 1 foot).
Now let's finish the bounce. Go to your frame box, and put in 60:
Now, move the ball back down to where it started, the easy way, Hit the "G" key, then the "Z" Key, then the "6" key, and then the "-" Key (this makes it go DOWN 6 units), and then hit Enter.
Your ball should be back where it started.
Once again, move your cursor to the 3D Window and hit the "I" key, and again, select "LocRot"
There you go. You now have a up / down or 1 "bounce" of your ball. Blender knows that when this animation starts, the ball should take 1 second to move up 6 feet, and then 1 second to move down 6 feet.
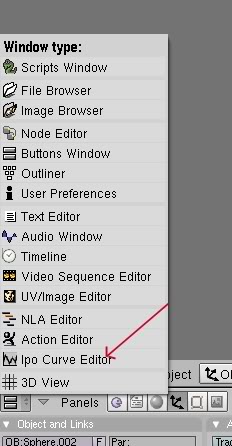
You can look at the IPO cover, by going to your window menu and selecting the IPO menu:
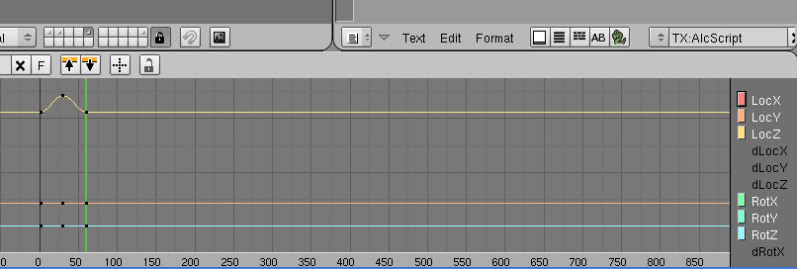
Then select "Object" in the drop down box. If you zoom out and look at the graph, you can see the yellow line has a "hump" in it. That line represents the "Z" axis, and is showing your ball will move up and down that 6 feet in 2 seconds.
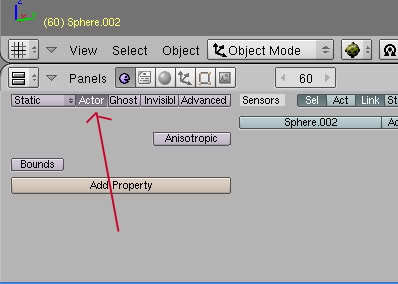
Now, the next thing you need to do, and this thing is IMPORTANT. Go to your Logic Panel, and select the "Actor" button. All animated objects MUST be made into an actor. If you forget this, you'll know when you go to link into the Age......Uru will crash on you.
Now for the last part: the ALCScripting. Even though we've told Blender what to do, we still need to tell the plugin how to export it. Here is the scripting:
Here it is in Code format if you want to copy and paste it:
Sphere.002:
    animations:
       - name: Bounce1
	 autostart: 1
	 loop: 1
Where "Sphere.002" is the name of our ball, "- name:" is the name of the animation that I made up off the top of my head. You can call it what ever you want, but for more complex animations (triggered), this will be important. "autostart:" is set to either 0 or 1. 1 means that the animation starts the moment you link into the Age. "loop:" is set to either 0 or 1. If we want to keep the ball bouncing over and over, we set this to 1. If you want it to bounce once and then stop, we'd set it to 0.
Okay, that's it. All you have to do now is export the Age and check your animation out.
For those of you that notice, the ball bounces, but our eyes say: "That's wrong." and you would be right. The physics are being violated. The motion we have given the ball is very linier. In the real world, a bouncing ball has Gravity acting on it. As it goes up, Gravity decelerates the ball, which is why it seems to come to stop in mid air, and why the ball returns to the earth. As it does return, it accelerates, until it hits the ground. This motion is NOT linier.
So how do we fix this?
LOTS of nit picking with those frames and keys! You have to make the ball appear to be slowing down as it goes up.....and have it appear to be going faster as it goes down. This is all possible by using the Frames and the Key settings.
Another thing you can do to make it look even more real is to deform the ball. You can have this in the animation too, by adjusting the scale of the ball by flattening it a little as it reaches the ground. Remember, you can animate scaling. However the way to do that is, when you hit the "I" key to set a key, you need to pick either "LocScale" or "LocRotScale", just remember to make the ball round again as it goes back up in the air.
I hope you found this tutorial informative.
Return To: Andy's Blender Tutorials
