Important! Please read the announcement at http://myst.dustbird.net/uru-account.htm
Also! Please read the retirement announcement at http://myst.dustbird.net/uru-retirement.htm
Avatar Ripples
Have you noticed when you walk through the water in some of the Ages, you can see ripples generated by the avatar?
You can do this too. You can do it for a fake surface water that is not a waveset, even if the texture is animated. And you can make it for a waveset water too.
Each type of water has a different way of doing it, so I'll talk about each method. First will be the Fake or Non-Waveset type of water.
The purpose of my tutorial here is to help expand a bit on this.
Getting Ready
Before you attempt this, it's important that you understand how to put in Footstep Decals or Footprints. Here is the tutorial for this:
Okay, now that you understand how to put in Footprints into your Age, doing the ripples for you Avatar is not too hard.
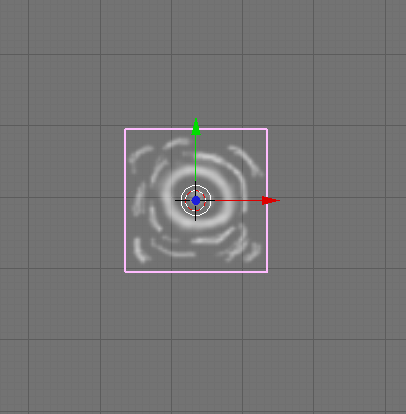
First you'll need a ripple texture of some sort. Here's one I made quickly in GIMP Shop. You can most likely make a better one. It's small, only 64 x 64 pixels and needs a alpha channel:
 Trust me, it's here, right next to this line of text (it doesn't display well with a white background).
Now after you've made your non-waveset water and are done with it, you need to add a mesh plane out of site, just like for the footprint decal. I made one and called it "pondripple" You'll need to apply the ripple texture like above and UV Map it. Also like the Footprint Decal tutorial, you'll need to name your Material something useful as it will be included in the ALCScripting.
Once you're done, you mesh should look like this:
Add the ALCScripting
Now for the ALCScripting. Here is the generic script for the footprint manager:
<object name>:
    logic:
        actions:
          - type: footmgr
            footmgr:
                matpreshade: <material ref>
                matrtshade: <material ref>
                lifespan: 20
                targets:
                  - <object name>
                  - <object name>
I know, I know. Footprints? But aren't we doing ripples? Yes, and why they made This redundant is beyond me, but this is how it is done.
Again, apply this script to your Ripple Decal Mesh you made. Here's mine that I did
pondripple:
    logic:
        actions:
          - type: footmgr
            footmgr:
                matpreshade: pondrip
                matrtshade: pondrip
                lifespan: 10
                targets:
                  - Pond
Where:
pondripple - is the name of my decal mesh.
pondrip - is the name of the material I applied to the decal mesh.
I set the lifespan to 10, so that the ripples only exist for 10 seconds Pond is the non-waveset water object that I want the ripples to appear on. NOTE: you can add more than just one object here, like if you have more than one pond or puddle.
Now for the ALCScripting that you must apply to your non-waveset water object. Here's the generic script for it.
<object name>:
    logic:
        actions:
          - type: puddlemgr
            puddlemgr:
                matpreshade: <material ref>
                matrtshade: <material ref>
                targets:
                  - <puddle surface>
                notifies:
                  - <footmgr ref>
                initu: <initial size of ripple in U-axis>
                initv: <initial size of ripple in V-axis>
                finalu: <final size of ripple in U-axis>
                finalv: <final size of ripple in V-axis>
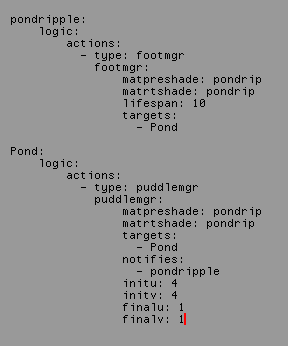
Here is how mine looks:
Pond:
    logic:
        actions:
          - type: puddlemgr
            puddlemgr:
                matpreshade: pondrip
                matrtshade: pondrip
                targets:
                  - Pond
                notifies:
                  - pondripple
                initu: 4
                initv: 4
                finalu: 1
                finalv: 1
Where:
Pond - is my non-waveset water object.
pondrip - is the name of the material of the water ripple decal I made.
As you see, for targets I have Pond listed, as it's the object that the ripples need to appear on. notifies I have pondripple, which is the name of the mesh that I applied my ripple decal.
Now "initu, initv, finalu, and finalv" the numbers you see there are what is suggested by the GoW Wiki. I've found that they work great, but you may need to play with these if your ripples don't look quite right.
Here is a pic of my ALCScripting:
That's all you need to do to apply ripples to a non-waveset water object.
Waveset Avatar Ripples
Now for Waveset type of water, you do just like above, with some slight changes.
Do what I wrote above just the same, except when you get to the last part, applying the ALCscript to your water object itself. In this case the waveset you have. You need to use this generic script instead of the one above:
<object name>:
    logic:
        actions:
          - type: ripplevsmgr
            ripplevsmgr:
                matpreshade: <material ref>
                matrtshade: <material ref>
                targets:
                  - <waveset surface>
                notifies:
                  - <footmgr ref>
                waveset: <waveset ref(same name as waveset surface)>
                initu: <initial size of ripple in U-axis>
                initv: <initial size of ripple in V-axis>
                finalu: <final size of ripple in U-axis>
                finalv: <final size of ripple in V-axis>
Now I applied mine to my actual waveset scripting and it works great! Here's my waveset script for my RAD Age Eder Bahvahnin. You can see where I added the above script to the beginning of my waveset script:
Waveset1:
    logic:
        actions:
          - type: ripplevsmgr
            ripplevsmgr:
                matpreshade: waterripple
                matrtshade: waterripple
                targets:
                  - Waveset1
                notifies:
                  - waterrip
                waveset: Waveset1
                initu: 4
                initv: 4
                finalu: 1
                finalv: 1
    visual:
        waveset:
            geostate:
                maxlen: 6.25
                minlen: 6.0
                ampoverlen: 0.01
                chop: 0.1
                angledev: 1
            texstate:
                maxlen: 7
                minlen: 1
                ampoverlen: 0.1
                chop: 0.5
                angledev: 0.87266
            ripplescale: 45
            specnoise: 0.25
            specstart: 25
            specend: 100
            depthrange:
                opac:
                    start: 0
                    end: 0.5
                refl:
                    start: 0
                    end: 1
                wave:
                    start: 0
                    end: 1
            wispiness: 0.5
            edgeopac: 1
            edgeradius: 1
            period: 1
            fingerlength: 1
            envrefresh: 180
            envradius: 4
And that's it!
Return To: Andy's Blender Tutorials

