Important! Please read the announcement at http://myst.dustbird.net/uru-account.htm
Also! Please read the retirement announcement at http://myst.dustbird.net/uru-retirement.htm
Avatar Foot Prints
Footsteps or Foot Prints In Your Age
Why would you want or need footsteps in your Age?
I don't know. Maybe you were messy making your Age and you spilled some paint......
Actually, adding foot prints to your Age can enhance it, and make it look interesting. You can use this if lets say the avatar walks through some snow, or mud, etc, etc. When they walk onto a sidewalk or something else, you can set it up where they leave footprints!
Cyan did this for Minkata, and it more than once helped me from being lost!
These footprints will fade however, unless you set them up to stick around for a long time.
Let's Dance!
Okay, you MIGHT want to plan this a bit. For example let's say you have a water area, like a pond or a puddle, and you want to make dark footsteps coming out of the pond or water. That's cool, but you don't want the footsteps to continue for 100 meters I would image. So you need to make sure that the mesh that you're going to have footsteps appear seem logical and the right size too.
Okay, first let's get started.
You'll need to make a foot print decal texture. Here is one you can use. This one is dark for like mud or dirt. If you want snow, you'll have to modify it, or make your own. The important thing is that it has an alpha channel for transparancy:
Okay, now make a plane mesh somewhere out of sight. You can leave it as 2 x 2 blender units, but you DO need to rename it. In my example here, I've named it "footprintmesh"
Now we apply the Material to it:
See where I've drawn my arrow? That's the name of the Material. You need to change the name to something too, as we have to use it in the scripting. I called mine "footprint"
Now add the texture:
As you can see from the Arrow I also named the texture "footprint"
Okay, now you need to go to Edit Mode, and unwrap your plane here, and UV Map it with that same foot print texture. Once you've done that, you also need to go to the Edit Panel. In the Texture Tab, you need to click on the "Alpha" button as show in my picture here:
Some people have said they've had to use the "Add" button. Try Alpha first and if it doesn't come out right, try the Add button.
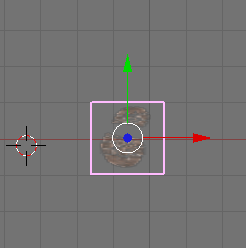
Now your mesh should look like this:
Okay, now we're done with this mesh, and we need to do some ALCScripting.
ALCScript Needed.
Okay, here's the basic scripting you'll need to add:
<object name>:
    logic:
        actions:
          - type: footmgr
            footmgr:
                matpreshade: <material ref>
                matrtshade: <material ref>
                lifespan: 20
                targets:
                  - <object name>
                  - <object name>
Here's what things mean:
<object name> this can be ANY object in your age, but I HIGHLY recommend that you use your foot print decal mesh. I did.
<material ref> remember how I made you name your material for the footprint decal mesh? This is why. You put that name here.
"lifespan" what ever number you put here, is the number of seconds that your footprints will stay visable. so 20 is 20 seconds. You can change this to what you want.
Now, the bottom <object name> 's that you see. THESE are the meshes where you want the footprints to appear. In my little test Age, I put Ground here. You can also list more than one object of course, so you can use the same footprint mesh decal for all the objects that you want to have these footprints on.
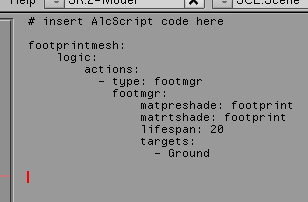
Here's a picture of my ALCScript for my test Age that I did this on:
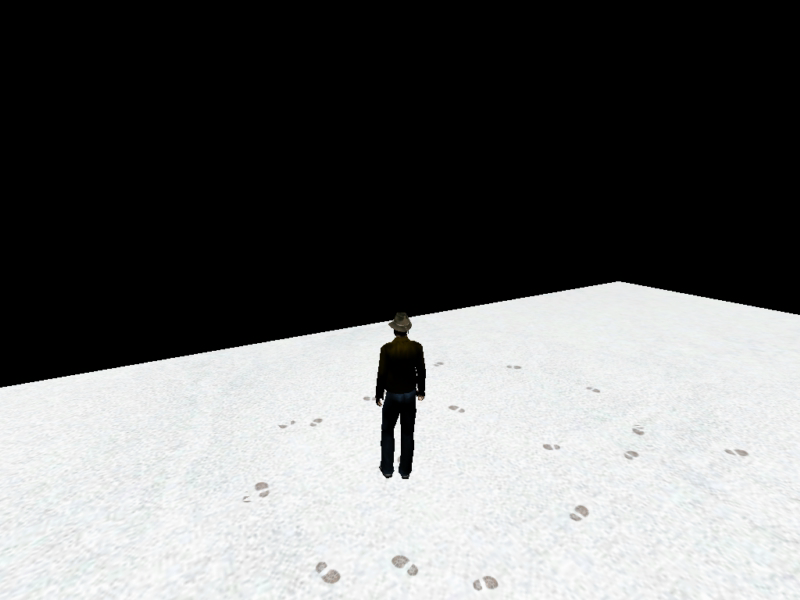
That's it! Now when you export and link in, you should see your footsteps:
Return To: Andy's Blender Tutorials


