Important! Please read the announcement at http://myst.dustbird.net/uru-account.htm
Also! Please read the retirement announcement at http://myst.dustbird.net/uru-retirement.htm
Interrupting An Animation
This tutorial will introduce you to making an animated object stop it's animation, and reverse it, without it starting over at the beginning. It assumes that you already know how to make an animated object.
If you link in to Gahreesen, you will remember how in the power room, we had to step on a plate to make a cylinder rise up, and if we stepped off the plate, the cylinder would begin to lower. We are going to re-create that same effect here.
A Video version of this tutorial can be watched here.
The Objects
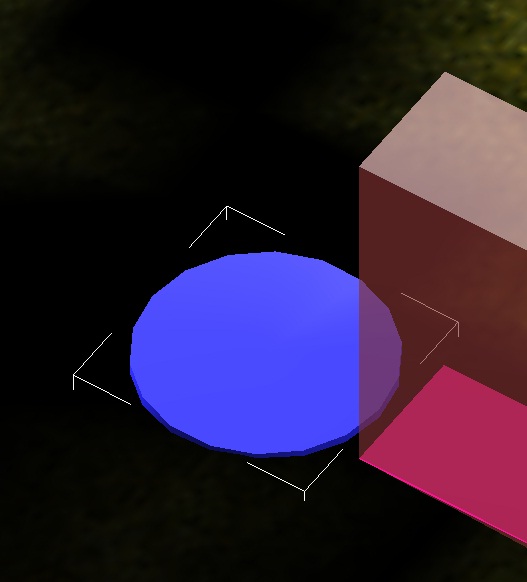
If you look at the picture below, you will see that I have a blue cylinder. It's about 10 feet high, but I have it sunk into the ground to where it just peeks out. The cylinder also has a animation, in that it will raise up to almost it's full height in 10 seconds (300 frames).
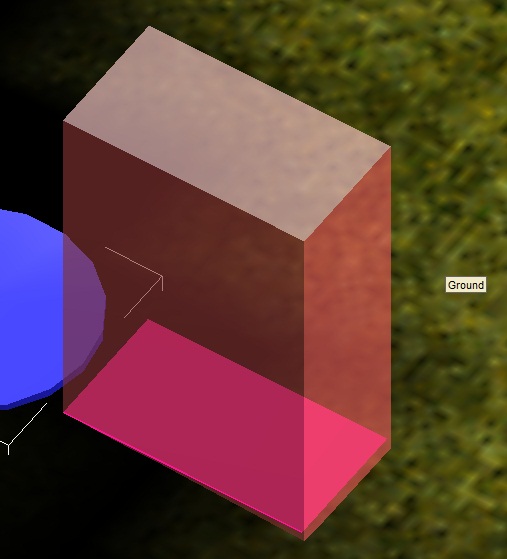
The other objects that I have, is a small plane, close to the ground. It will represent the "plate" that the avatar steps on. We also have 2 sensor regions here, one right on top of the other one.
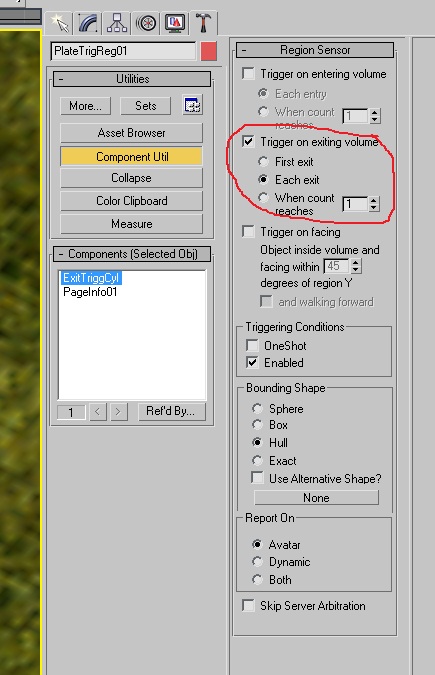
Select one of the boxes that is going to be a region sensor, and apply that component on it. In the roll out for it, make sure you put a check mark under "Trigger On Exiting Volume" only. We want this region sensor to only trigger when you leave it:
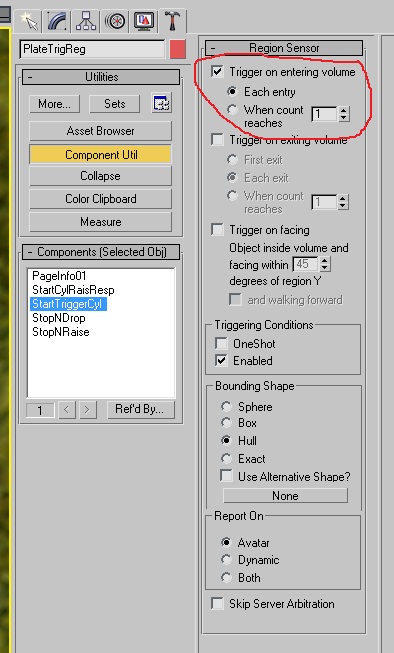
Next, select the other box and make it a region sensor to, but make sure you put a 2nd region sensor component on it. In it's roll out, make sure you put a check mark under "Trigger On Entering Volume" only. We want this region sensor to trigger only when we enter it, but not when we leave it:
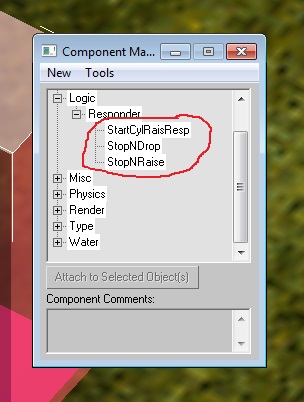
Now open up the Component Manager and create 3 logic responders. Name them in a way that makes sense to you. I have my labeled so that one is the "Starting" responder, one stops the animation and makes it drop, and one stops the animation and makes it rise:
You can attach these responders to what ever object you like. I have mine all attached to one of my regions sensors so I can see them all.
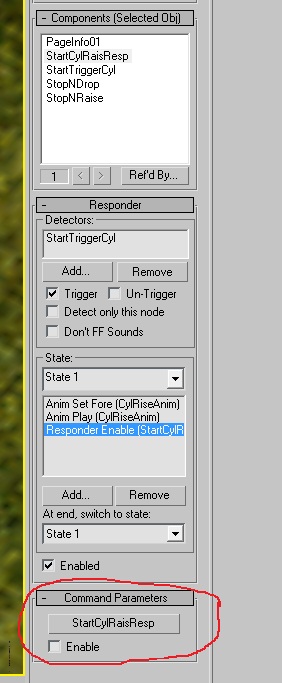
Select the responder that is going to be your "Starter" responder. Make the detector your region sensor that triggers on "Enter" only. Give it the following commands: Set Animation Forward, Play Animation, and Enable Responder. The animation is of course our cylinder. We are going to use the "Enable Responder" command to turn of this very responder however as you can see in my picture below:
Why did we do that? Because we do not want this responder to be "on" anymore after it is first triggered. Instead, another responder will take over. Think of it like the starter motor on a car, once you get the engine cranked, you do not want the starter to still be running.
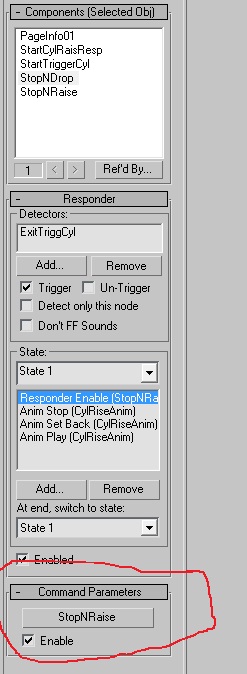
Now select the responder that is your Stop and Drop one. The detector for it needs to be the sensor region that triggers on Exit only. Give it 4 commands: Stop Animation, Set Animation Backwards, Play Animation, and Enable Responder.
The animation commands are all for the cylinder of course. The Enable Responder needs to turn on the 3rd responder, our Stop and Raise responder as shown in my picture above.
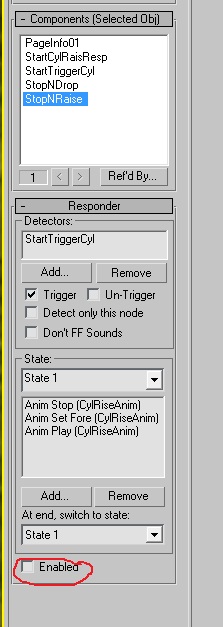
Now select the 3rd and last responder. It's detector needs to be the region sensor that triggers on Enter only. Give it 3 commands: Stop Animation, Set Animation Forwards, Play Animation:
As you can see from my picture above, I have removed the check mark where it says "Enable". This will have the responder start off as "Off" until it is turned on by the 2nd responder.
That's all you need to do for this. Of course there is texturing and adding sounds, etc. However you can now export and give it a try. Here is a video of how it looks:
Return To: Andy's Max Tutorials
