Important! Please read the announcement at http://myst.dustbird.net/uru-account.htm
Also! Please read the retirement announcement at http://myst.dustbird.net/uru-retirement.htm
Basic Object Animation
This tutorial assumes you do not know how to animate an object that you have made in Max. It will cover how to place a simple animation on that object.
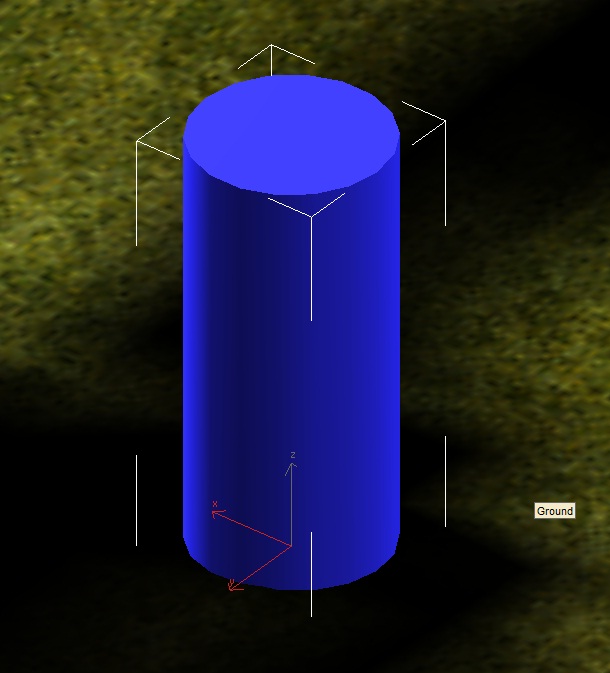
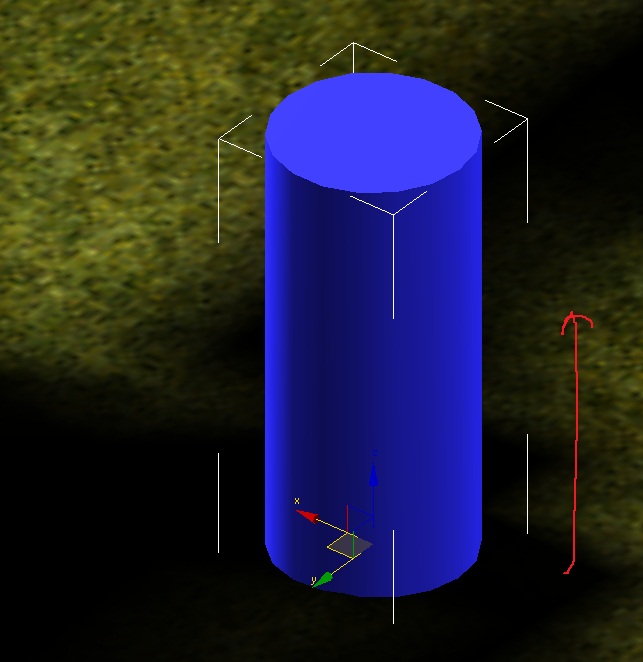
I've made a blue cylinder here, and what I want it to do is rise out of the ground:
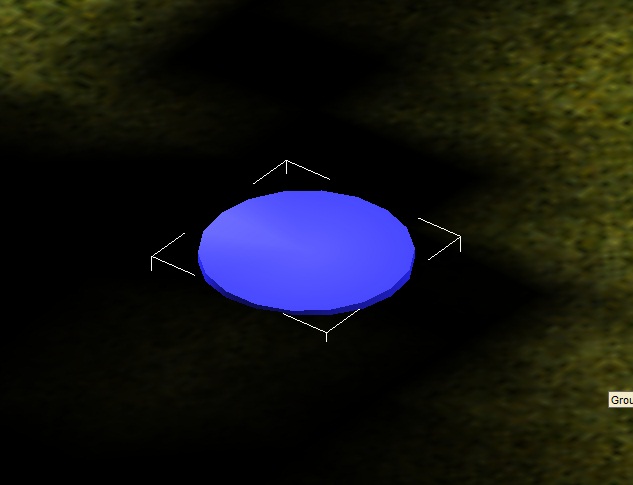
Once it is made, I move it to where it is just poking out of the ground. This will be where the beginning of the animation happens:
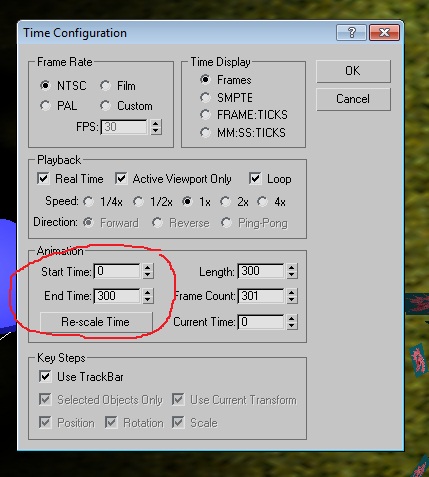
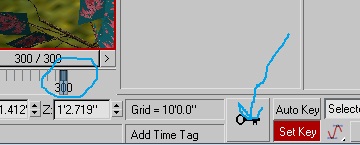
Now we need to look at our frame rate bar. This is located towards the bottom of your screen. Default in Max is 0 to 100 frames. I've made mine 0 to 300:
This is important as when you go to export your Age, you MUST have this bar set to the longest animation that you have in your Age. My cylinder will use 300 frames to animate (30 frames = 1 second, so the animation is 10 seconds long). However, if I have another object who's animation is say, 1000 frames, then the frame bar MUST be set to 0 to 1000 frames. To change this, go to the bottom right of your screen and click on the little icon that looks like a window with a clock in it:
This will cause a window to pop up. In this window you can set the frame length. Look at my picture below for this:
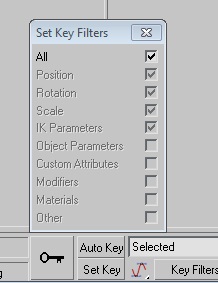
Now we need to set our Key Filters. The Key Filters are used to set what type of animation information we are going to use: Position, Rotation, Scale, Material, etc. If you click on this button here in my picture below, you can set your Key Filters:
It will call up a little window, where you can place check marks of the animation information. I'm very lazy and just have it set to "All", but you can set it to how you like. Just remember, that if you go to animate another object, and you only had "Position" selected, and your new object will rotate, you will have to come back here to change that (hence why I just leave it set to "All" all the time, but that is how I like to do it):
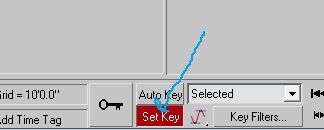
If you have your object placed where you need to start the animation and you have it selected, then go down and click on the button marked "Set Key":
When you do, it will turn red. So will the screen just above your Frame Bar:
This is to let you know that you are in "Animation" mode.
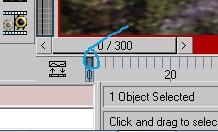
Make sure that your frame bar is set all the way back to Frame 0. Next, go down and click on the button that looks like a Key:
This will set a Key at frame 0 for you on your object:
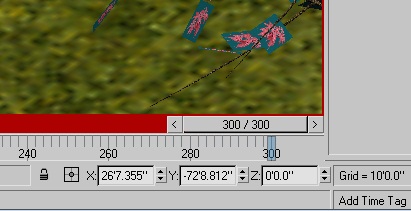
Now move your frame bar to where you need it for the end of the animation. In my case, the animation will end at frame 300, so I have moved the bar to there;
Next: Move the object to where you need it. In my case I moved the cylinder up along it's Z axis, as that is what I want it to do is rise up. You may have your object do something different, like move differently, or rotate:
Now go back down and click on the button that looks like a Key again, this will put a key at the last frame:
Note: you MUST make sure that you have already moved your object how you want it BEFORE you place this key!
You can now go back down and click on the Set Key button again, to turn it off:
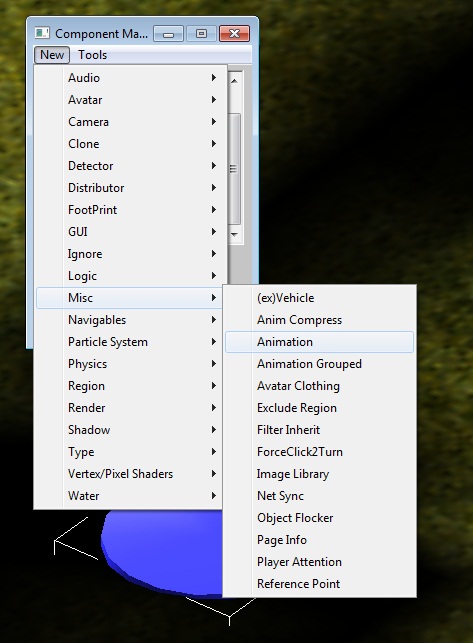
Now we need to place a Animation component on our object. Open up the Component Manager, and click on New > Misc > Animation:
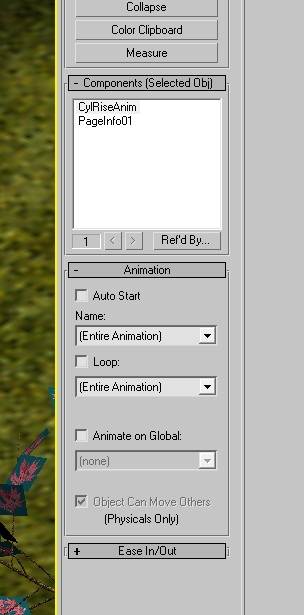
In the roll out for the animation component you have several options:
There are 3 to pay attention to: Autostart, Loop and Animate On Global.
Autostart - Placing a check mark here will make the object animate as soon as a person links into the Age.
Loop - Placing a check mark here will make the object's animation play over and over.
Animate On Global - Placing a check mark here will have the object's animation be stretched out over the time of the Age. If you have the length of the Age's day set to 24 hours in the .age file, then your object's animation will take a full 24 hours to complete (this is mostly used for Day / Night cycles like in Eder Gira).
I want my object to not animate until the player does something, and I do not want it to loop, so basically I do not need to do anything here.
Next however, I need to set up Markers in the Dope Sheet. Go up and click on the menu where it says "Graphic Editors" and in the drop down, click on Track View - Dope Sheet:
[[File:Basicanim17.jpg]
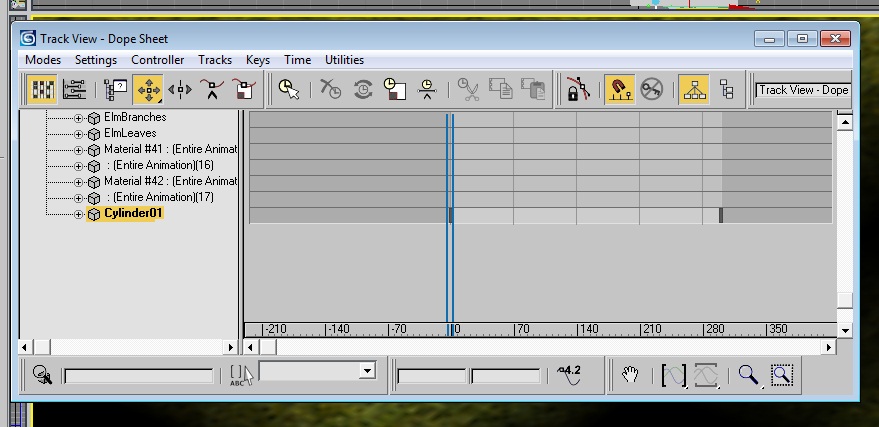
This will call up a box that looks like the picture below. Scroll down and select your object that you are animating:
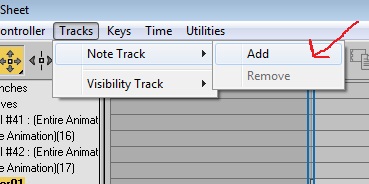
Now we need to add a Note Track. Go up in this box and click on Tracks > Note Tracks > Add:
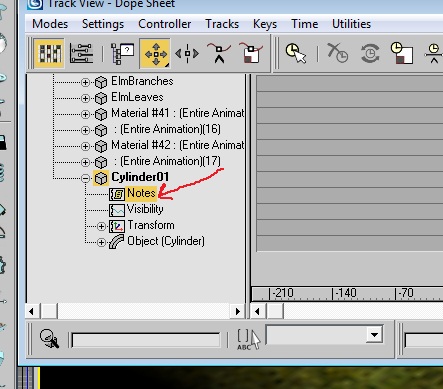
Now go down and select the Note track we just added to our Object:
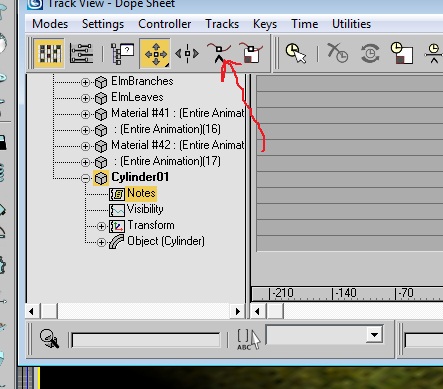
Now we need to put our Markers in. Go up and click on this button here:
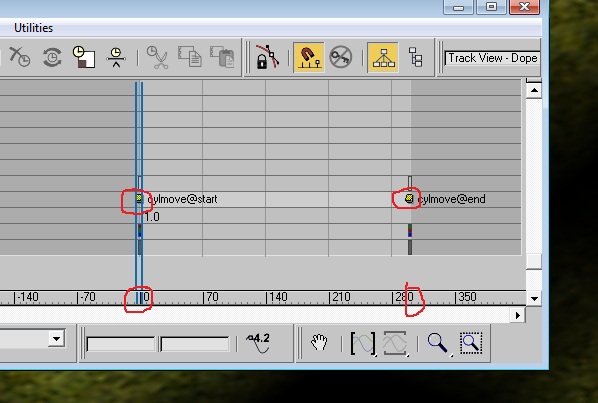
On your note track, place a marker at the beginning frame time and at the ending frame time:
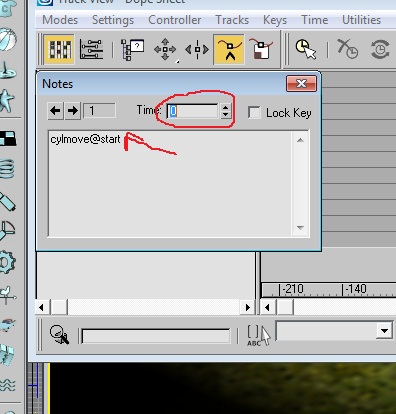
Next, right click on the first marker you placed at the beginning frame. A small box will pop up. Make sure it says Frame 0, and then in the box, you will need to type a message. You will need to make up a name then type in @start:
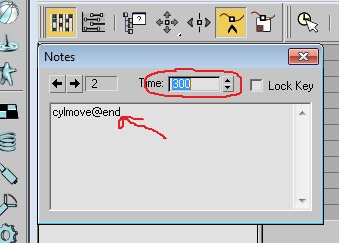
Close the little box, and right click on the other marker at the last frame. You will see another small box pop up. This time make sure it shows Frame 300 (or what ever your last frame is) and use that name you made up again, only this time, end it with @end:
And that is that! You object is now animated. How you trigger the animation is completely up to you.
Return To: Andy's Max Tutorials
