Important! Please read the announcement at http://myst.dustbird.net/uru-account.htm
Also! Please read the retirement announcement at http://myst.dustbird.net/uru-retirement.htm
Difference between revisions of "Shore Foam"
AndyLegate (talk | contribs) (Created page with 'I'm going to assume that you know how to make Wavesets for this tutorial. Here's a pic of Zephyr Cove's beach line: File:KIimage0025-2.jpg Making shores is not too hard, …') |
AndyLegate (talk | contribs) |
||
| Line 45: | Line 45: | ||
Last, is you need to set the Passindex. Because the shore foam is transparent like the waveset, you have to treat it like any other transparency and give it an order of when to render. Here's a pic of how mine is set: | Last, is you need to set the Passindex. Because the shore foam is transparent like the waveset, you have to treat it like any other transparency and give it an order of when to render. Here's a pic of how mine is set: | ||
| − | [[Shores6.png]] | + | [[File:Shores6.png]] |
I have it set to 3 because my waveset is set to 2. | I have it set to 3 because my waveset is set to 2. | ||
Latest revision as of 02:22, 9 January 2011
I'm going to assume that you know how to make Wavesets for this tutorial.
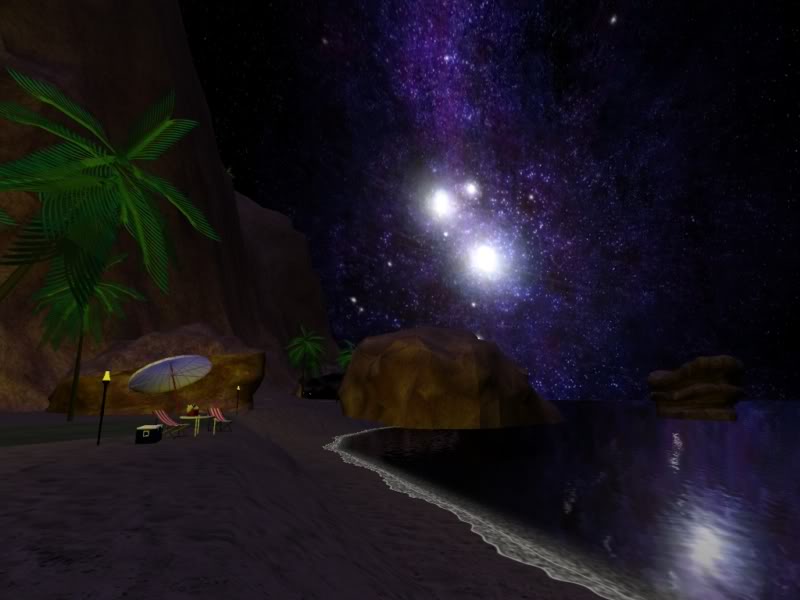
Here's a pic of Zephyr Cove's beach line:
Making shores is not too hard, but there can be some work involved with it.
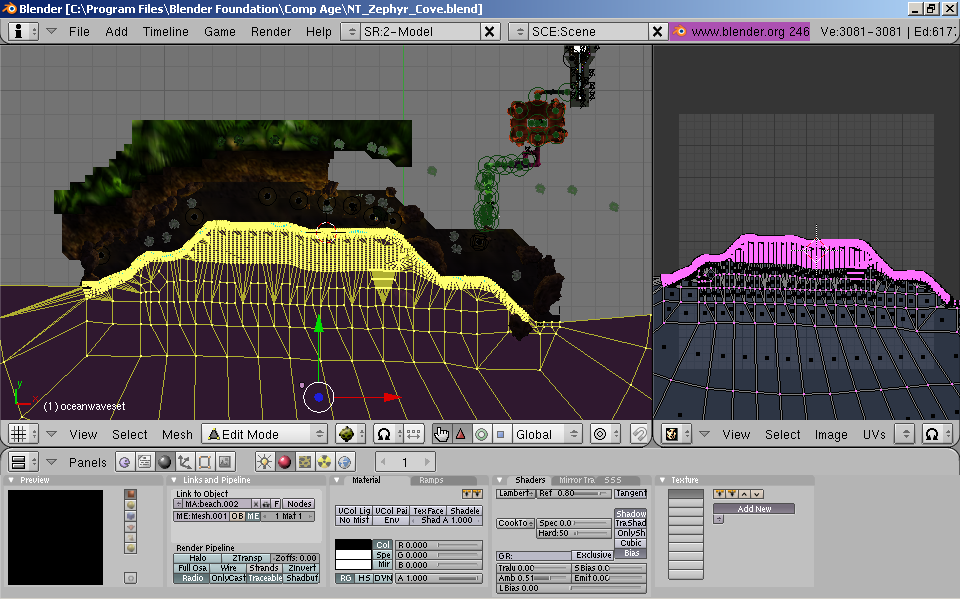
First you need to select the waveset mesh and go into Edit Mode with it:
Here's Zephyr's ocean waveset (yes, it's quite complex):
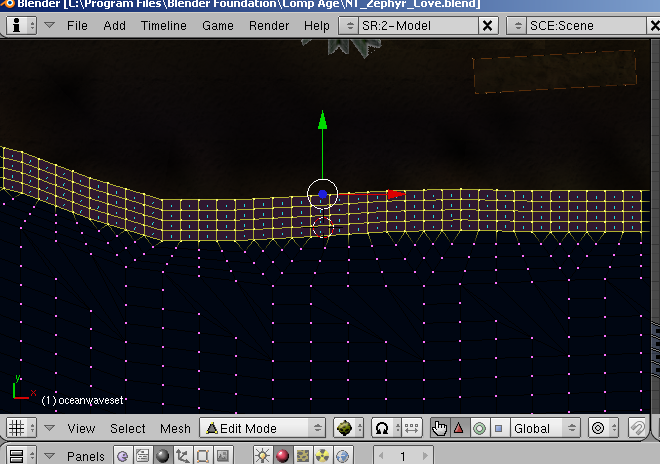
Next, you need to select just the edge of the mesh where it meets the beach:
NOTE: If you used a very simple mesh, such as a plane, you are going to have to build a mesh around the edges. You can try duplicating the simple mesh, and subdividing it into different faces, then delete the middle faces so that all you have are faces around the edges.
Once you have selected the edges of your waveset mesh, use Shift-D to duplicate them. Then hit the P key and select separate. Now you have a separate mesh for your shore. Rename it to something useful, I called mine "shore"
Next, while still in Edit Mode, if your waveset mesh was not flat (mine was sloped here) then you need to make it flat. Do this by hitting the S key, then the Z key, then the number 0 and hit enter. this will make your shore mesh completely flat.
Now move the mesh up or down to where it is the same height at your water!!!!
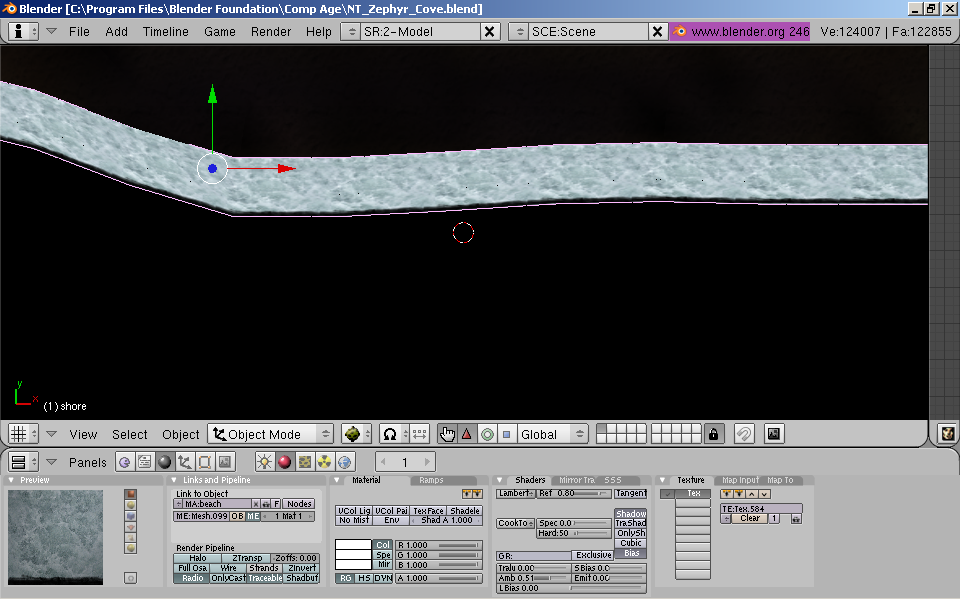
Now go into the Materials Panel, and make the material there a single user. Remove any textures that you used for your wave set, and replace it with a disturbed water looking texture:
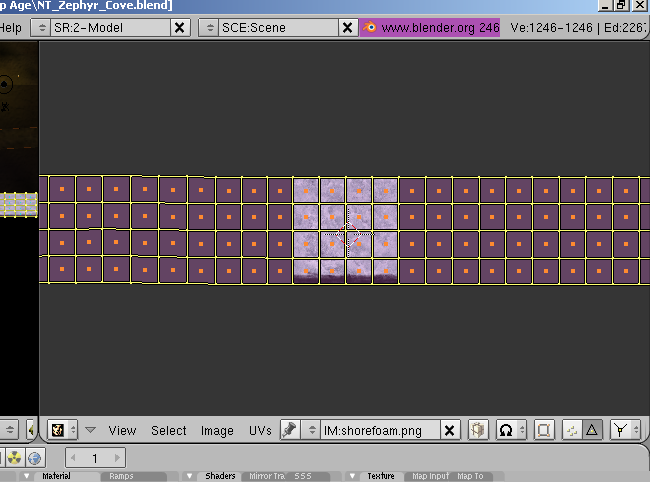
Now the next part is what seems to be getting people. You have to UV Map the shore correctly, or it won't look right when you link in. Unwrap the shore mesh. Then in the UV Editor window, manipulate the faces of the object so that all the faces line up in a straight line (going left to right) and to where the faces cover the texture, like this:
This can take a LOT of time to do. Just be patient and deal with it. You've seen the results in Zephyr so it's worth it. If you have a small waveset, it will take you a lot less time. Use the same texture of disturbed water that you used in the Materials Panel.
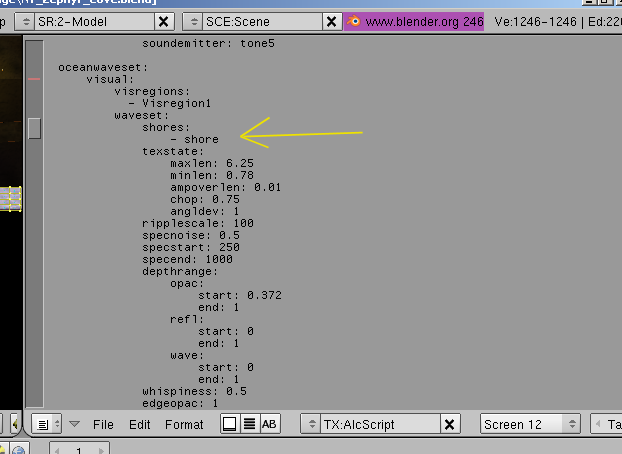
Now you need to put in the ALCscripting for it. It's all of 2 lines. My yellow arrow points to where it goes in the scripting.
The second line is the actual name of the object.
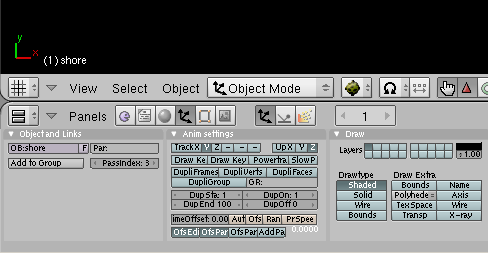
Last, is you need to set the Passindex. Because the shore foam is transparent like the waveset, you have to treat it like any other transparency and give it an order of when to render. Here's a pic of how mine is set:
I have it set to 3 because my waveset is set to 2.
That's all there is to it.
Return To: Andy's Blender Tutorials
