Important! Please read the announcement at http://myst.dustbird.net/uru-account.htm
Also! Please read the retirement announcement at http://myst.dustbird.net/uru-retirement.htm
Environmental Maps aka Reflections
This tutorial covers how to make both Static and Dynamic Environmental Maps.
The difference between Static and Dynamic, is as their names suggest: One is Real Time and the other is frozen in time.
Dynamic Environmental Maps allows you to have Real Time reflections. Static Environmental Maps will make a reflection that are actually pre-rendered images.
Contents
Static or Dynamic? Which Do You Use?
This is a very good question, and one that should be considered very carefully.
Dyanamic Maps are Real Time. So they help with the sense of realism. But they are a resource hog and can affect your Age's performance, especially for those people that have low end computers.
Static Maps are not a resource hog and help with Age performance, but can affect the Age's sense of realism.
What you need to do is take a look at where you need reflection, and think about what people will see:
Is it a large object? Will players be able to see the reflections clearly? Are their animated objects nearby that will be both reflected AND will the players see that reflection of them clearly?
If you are thinking about reflecting the Avatar and other player's Avatar, you can forget that right now. We do not normally allow the avatar to cast a reflection. This is because of how Plasma will render the map. If your Age is multiplayer, as other people link in later, after you, their reflections will not look correct.
Here is some advice on when you should use Dynamic and when to use Static maps:
Use Dynamic if:
- It's crucial for the player to see real time reflections.
- You have animated objects that will be reflected and seen by the player in the reflection (IE like swaying lights)
- You have something that changes (day / night cycle, weather cycle, materials animating or lights).
- If by using Dynamic is not causing your Age to perform poorly.
Use Static if:
- The object is small and reflections won't be seen clearly (IE like small glass bottles)
- If there are no animated objects around to be reflected.
- If using Dynamic maps causes a huge reduction in Age performance.
Now to show you how to do each.
Dynamic Environmental Maps
This tutorial assumes you know how to set up Cyan's Plugin in Max, that you know how to create and textures objects in Max, and how to set up an Age.
This is basically simple and not that hard. You will be basically applying a material with 2 textures to your object.
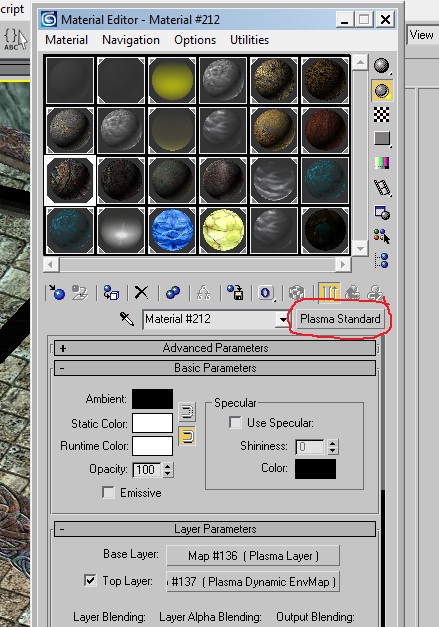
Once you have your object made, open up the Material Editor and give it a Plasma Standard material (you can use others like Plasma Composit if you need to).
Go ahead and in the first Plasma Layer, apply your base texture for the object (what texture you're going to have the object look like). It's the 2nd layer that will make it look shiny/reflective
Place a check mark in the box that says "Top Layer" and then click on that button:
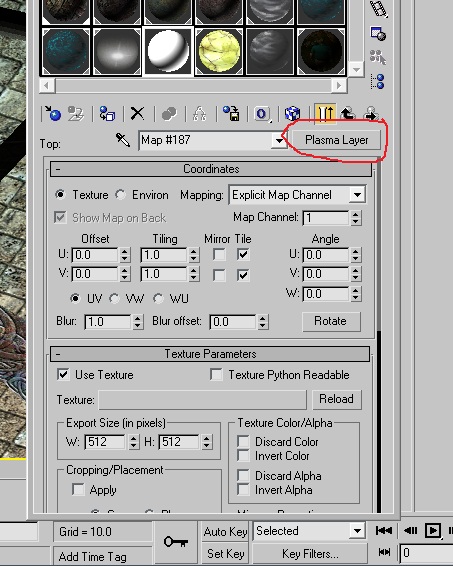
Go up and click on the button that says "Plasma Layer"
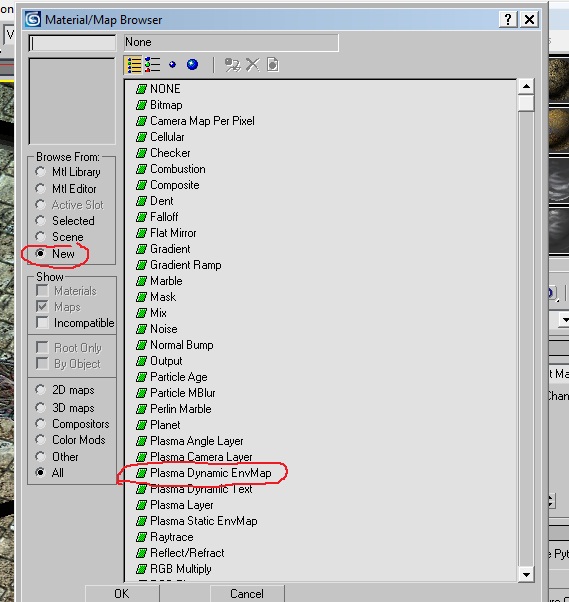
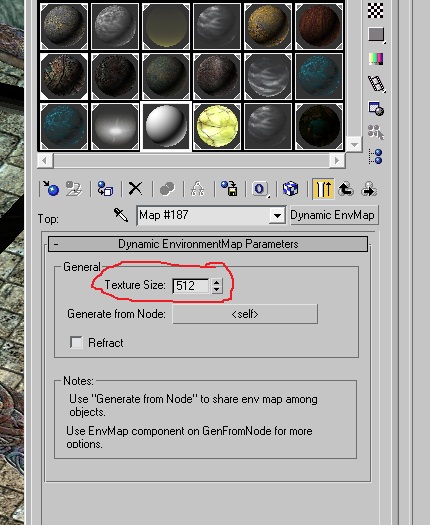
A new box will open up. You want to select Plasma Dynamic EnvMap
You're top Plasma Layer will look like this:
Make sure that the texture size reflects the approx size of your base layer (mine was 512 x 512)
That's all you need to do here. Now go back to the Material itself:
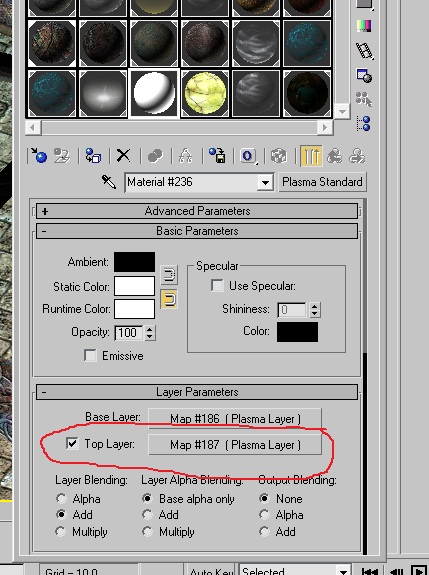
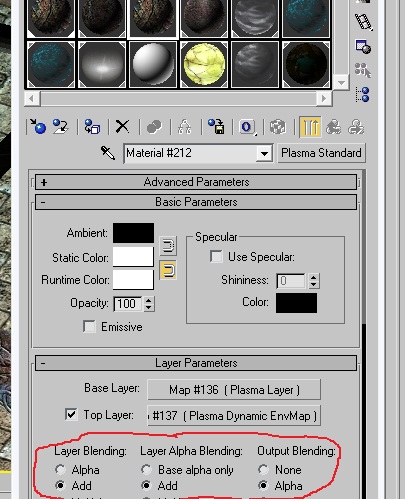
In the Layer Parameters, go down and make your blends look like mine:
Layer Blending is: Add, Layer Alpha Blending is: Add and Output Blending is: Alpha
(note: you can play with these, but these settings gave me the best results)
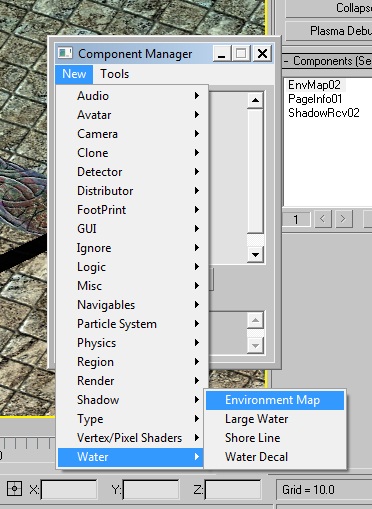
Now call up the Component Manager. Click in New> Water> Environmental Map:
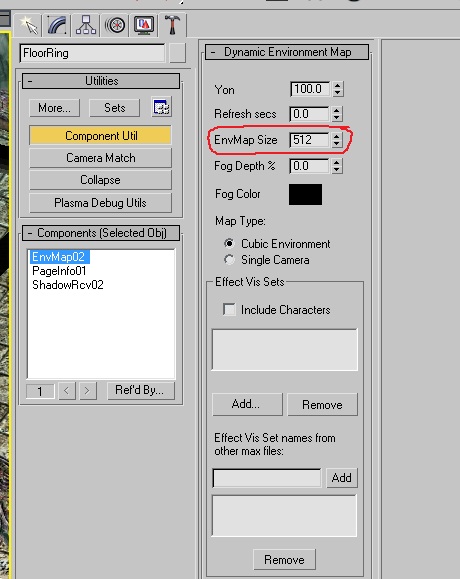
Assign that to you object. Then go to the Component Utils and make the settings:
Make sure that the Texture Size matches what you placed in the layer.
That's it! Again, you can play with the settings if you want.
Static Environmental Maps
Static Environmental Maps can also be used two ways:
Either for something that is transparent, but reflective like glass or water, or for something that is solid, but shiney, like a polished metal surface.
In the first case, you'll use the Static Environmental map as your only layer (usually, there are exceptions). In the second case, you'll use the Static Environmental map as your top layer, with the first or base layer being opaque.
In this example, I'm going to show you how to use it for an object that is transparent, but reflective: a bottle.
Once you have your object made, you need to give it a Plasma Standard material in your Material Editor.
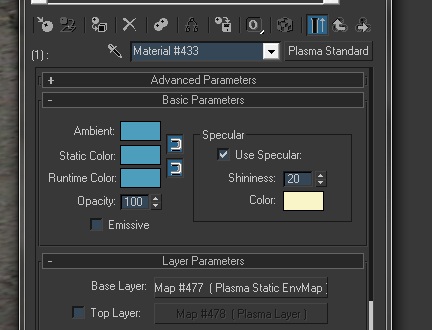
Since some glass is colored, you can use the Ambience, Static and Runtime colors the color you want. I also wanted my bottle to have what looks like a shine spot on it, so I gave it a Specular value of 20 and set the color for that:
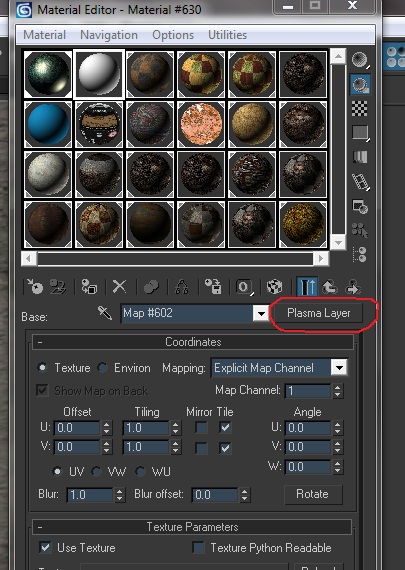
Next, click on the first or base layer. Then click on where it says Plasma Layer:
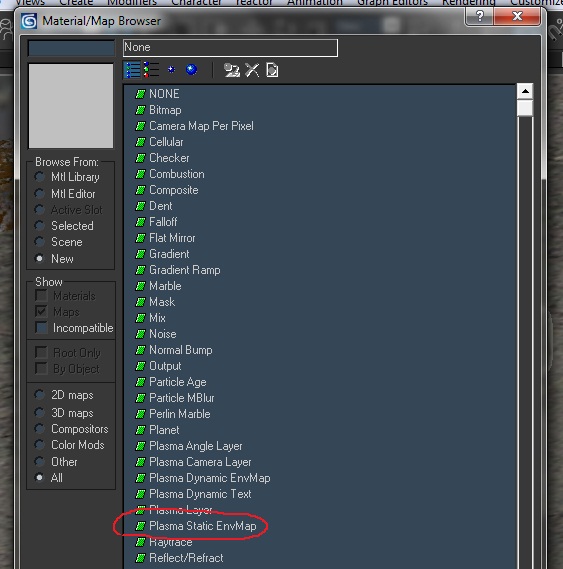
In the menu that comes up, you need to select where it says Plasma Static EnvMap as this is the kind of layer we want:
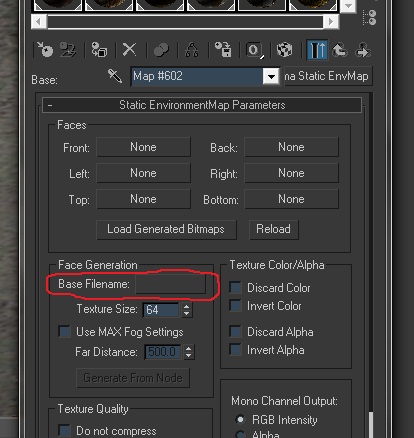
Now here is what you will see:
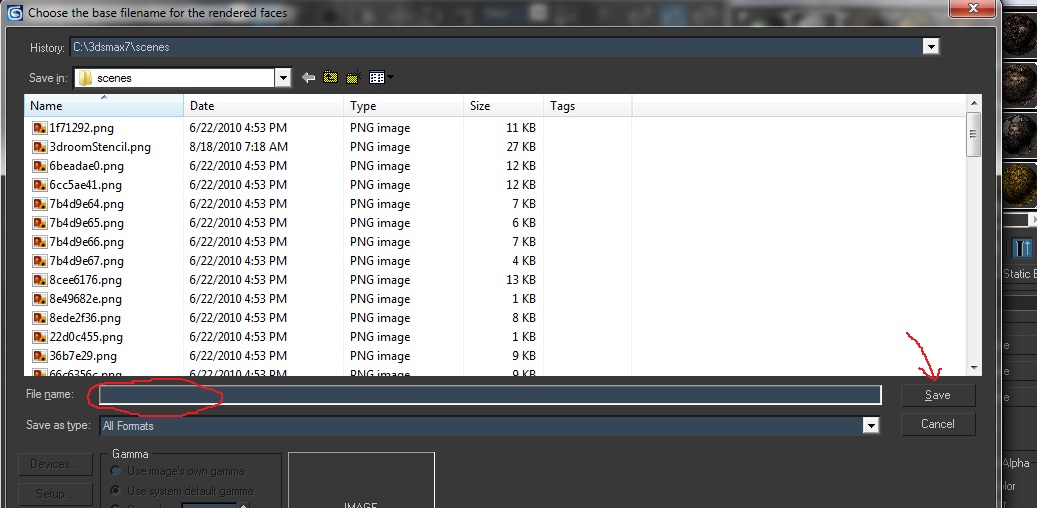
Now pay attention to where I've circled "Base File Name", you are going to click on the blank button there. This will pop open a new window:
Now this window should be set to where you've been keeping all your textures for you Age. If it isn't, you should navigate to it. But keep in mind that we are not GETTING a file. You will be MAKING a file. You'll need to type in a name in the file box (like MyAgeEnvMap) and you'll need to end it with a extension. I always use .png extensions personally. I would NOT recommend .jpg. Once you have done this, you need to click on the Save button.
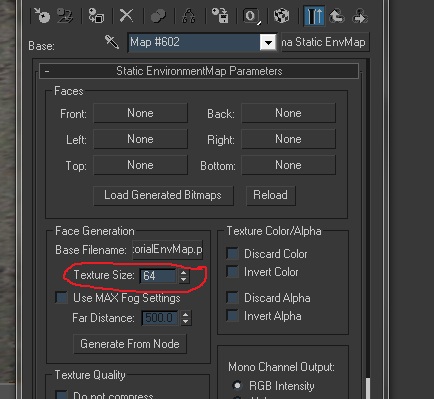
Now we are back here:
See where I have circled? This is going to be the resolution of your map. Default is 64 x 64 pixels. Keep in mind the bigger the pixel size, the better looking your map will be. For really small objects I would suggest using 128, or you can make it bigger (just keep it to either 64, 128, 256, or 512).
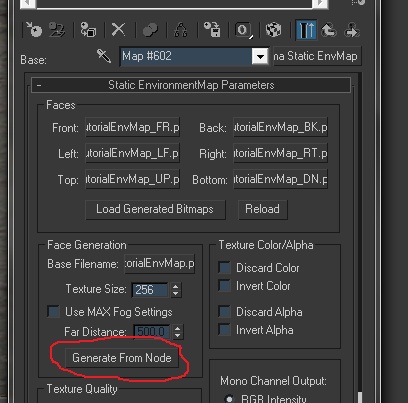
Next, click on the button that says "Generate From Node".
When you click on this, Max will be waiting for you to do one of two things:
Either you click on your object you are putting the map on, or you can hit the "H" key on your keyboard and select your object from a popup box.
When you do, you will see a small window pop up (the bigger the resolution you make, the bigger this window will get.). Max is going to take pictures of your scene all around your object: Top, Bottom, Left, Right, Front and Back. The bigger the resolution, the longer this will take (few more seconds, it's quite fast).
Now you can see that all the buttons for each map are filled. You've made your Static Environmental Map!
Something Went Wrong
If you see one of these things, then something went wrong:
Okay, the box popped up, and I think it rendered my pictures, but they were ALL black!
If that is what you saw, then it means you have NO Max lights lighting your scene! If you are using just Run Time lights, Max will not render that lighting. So even if you want to keep it as only Run Time lights, you'll have to put in at least one Max Light while you are making your Static EnvMap. You can take the Max light back out once you are done.
I saw the box pop up, but while the pictures were rendering, I saw strange boxes and other shapes that shouldn't be there.
Those would be your Regions. Any "non-rendered" objects in your Age, like Region Sensors, Colliders, etc, will show up in your Max rendered scene, and in your rendered pics for your Env Map. You must select them an hide them until the pictures are done for your Env Map.
The pics look fine......except they are like from way over across the room! They are not centered where my object is!
This is because your object's Center needs to be where you want your pics taken. IF for some reason, you can't move your object's center to where you need the pictures generated from, simply create a Dummy, and put it where you need it, and use the Dummy as your Node. You can then remove the Dummy once you are done.
Return To: Andy's Max Tutorials
